![Gallery[13e9]](http://images.twibright.com/tns/lvl2/13e9.jpg) |  | Overall view
We are going to build a holder: | |
|
|
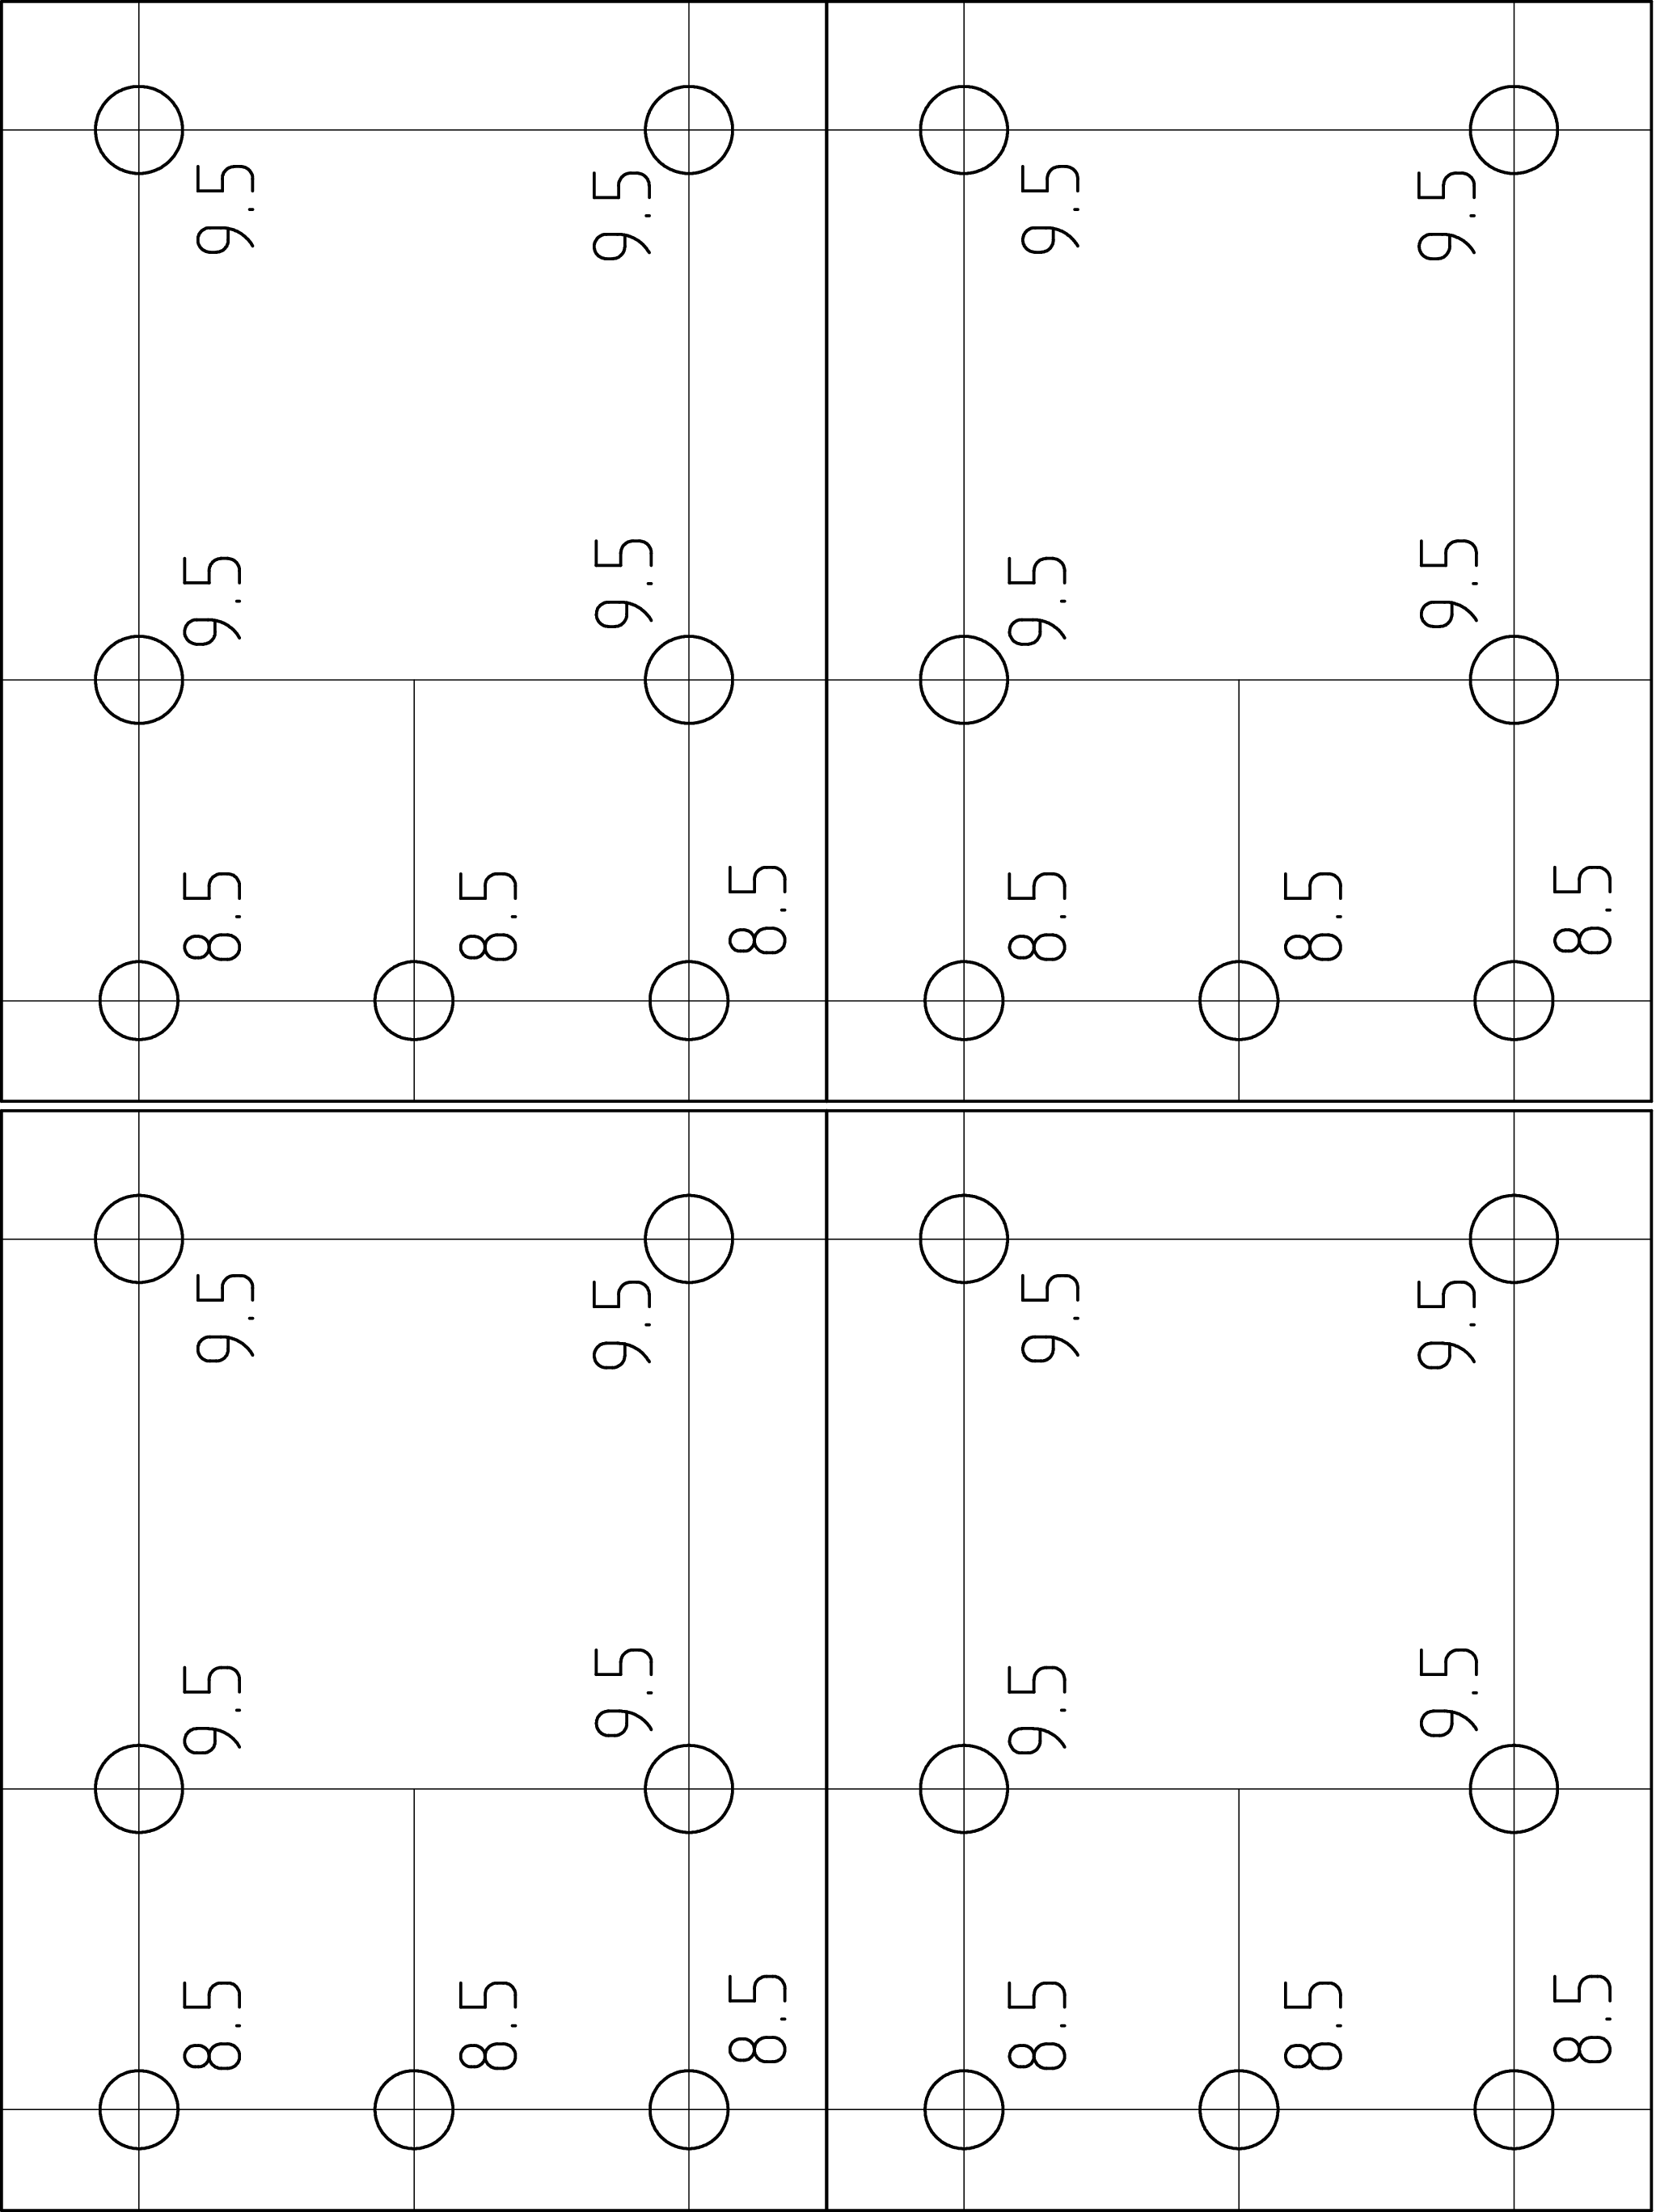
Quoin template If you
have exact printer, print out these three templates and glue the appropriate
one on your 100x100 steel section.
Expanded quoin templates
|
|
|
|
|
Aiming Gauge
- If you have accurate printer, print out this template, glue on a tin, and
cut or chisel out.
- If not, measure the gauge manually. The number indicate width of the
part in millimeters.
|
|
|
|
|
Purpose of aiming gauge
- It is for checking minimum, maximum and starting compression of the rubber
aiming blocks.
- Lead of the M8 screw is 1.25mm. The useful range is 6mm or 4.8 turns.
|
|
|
|
|
|
|
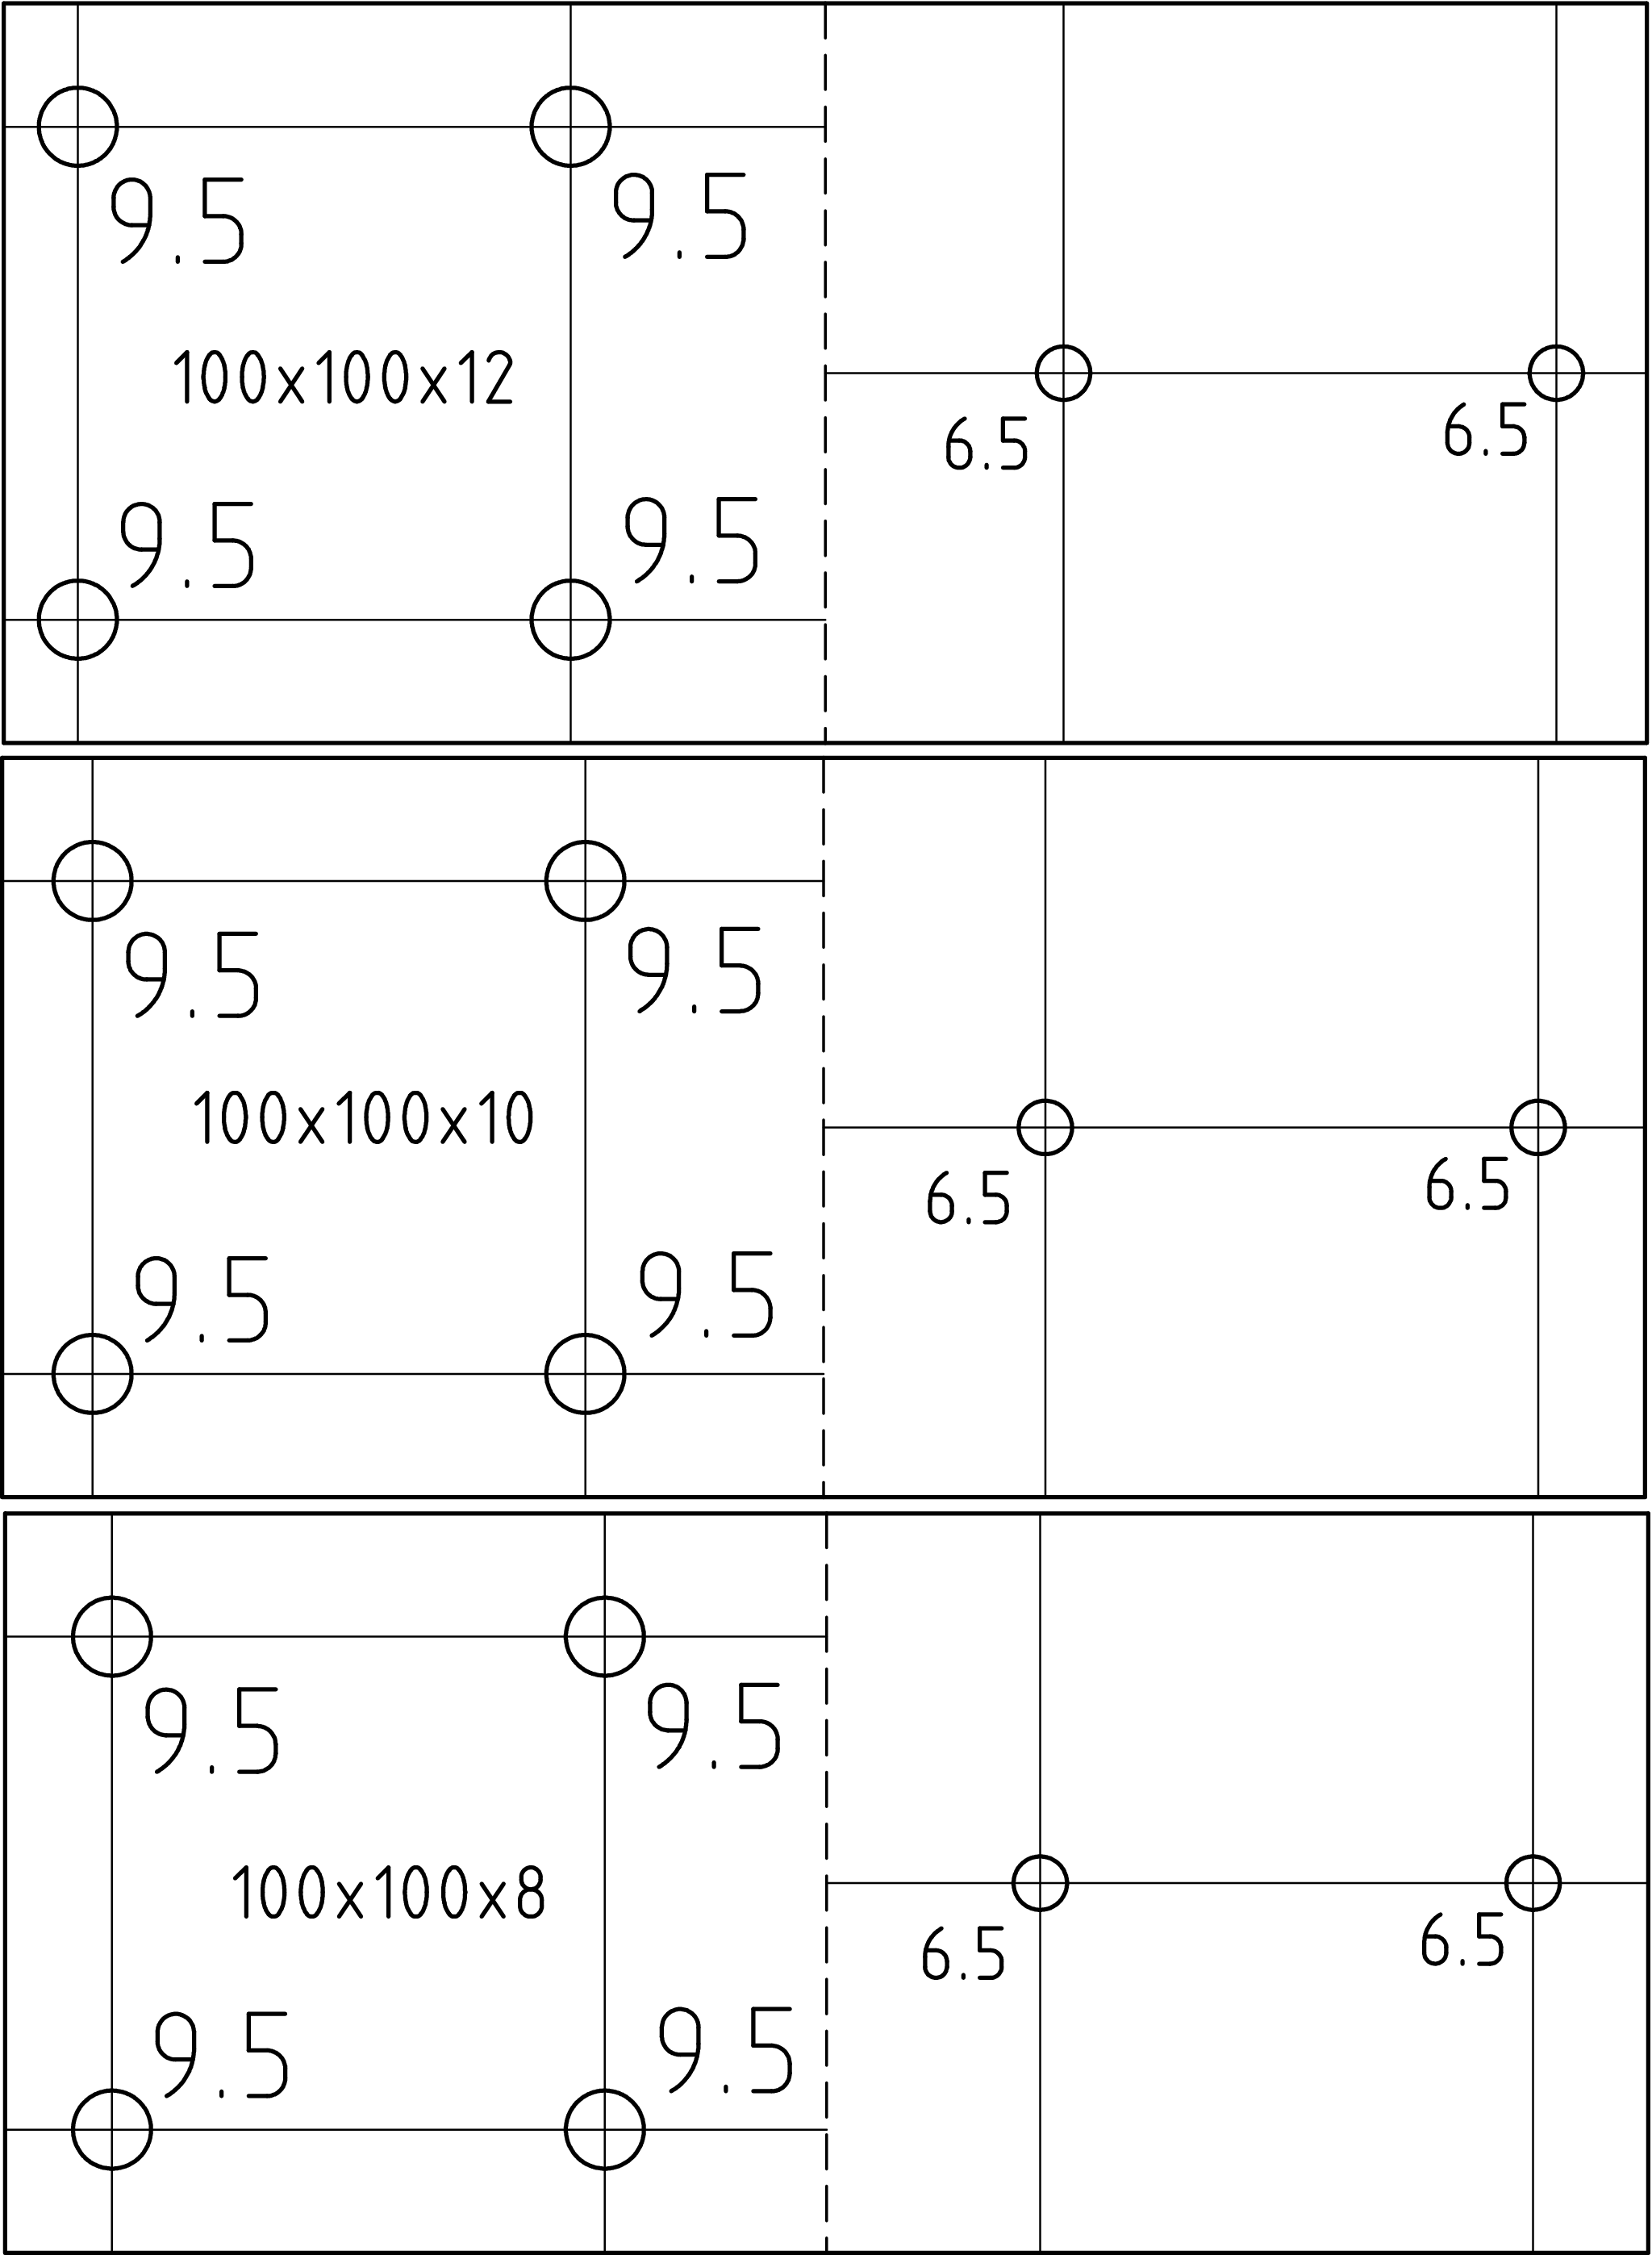
Plate template
- If you have accurate printer, print out this template, otherwise jump to
the next box ("Drill out the plate").
- The template is for 4 identical plates, you need only one for a holder
- The gap between the templates is suitable for a saw, too.
- Cut out the template and glue on the 90x8(10,12) flat steel
|
|
|
|
|
|
|
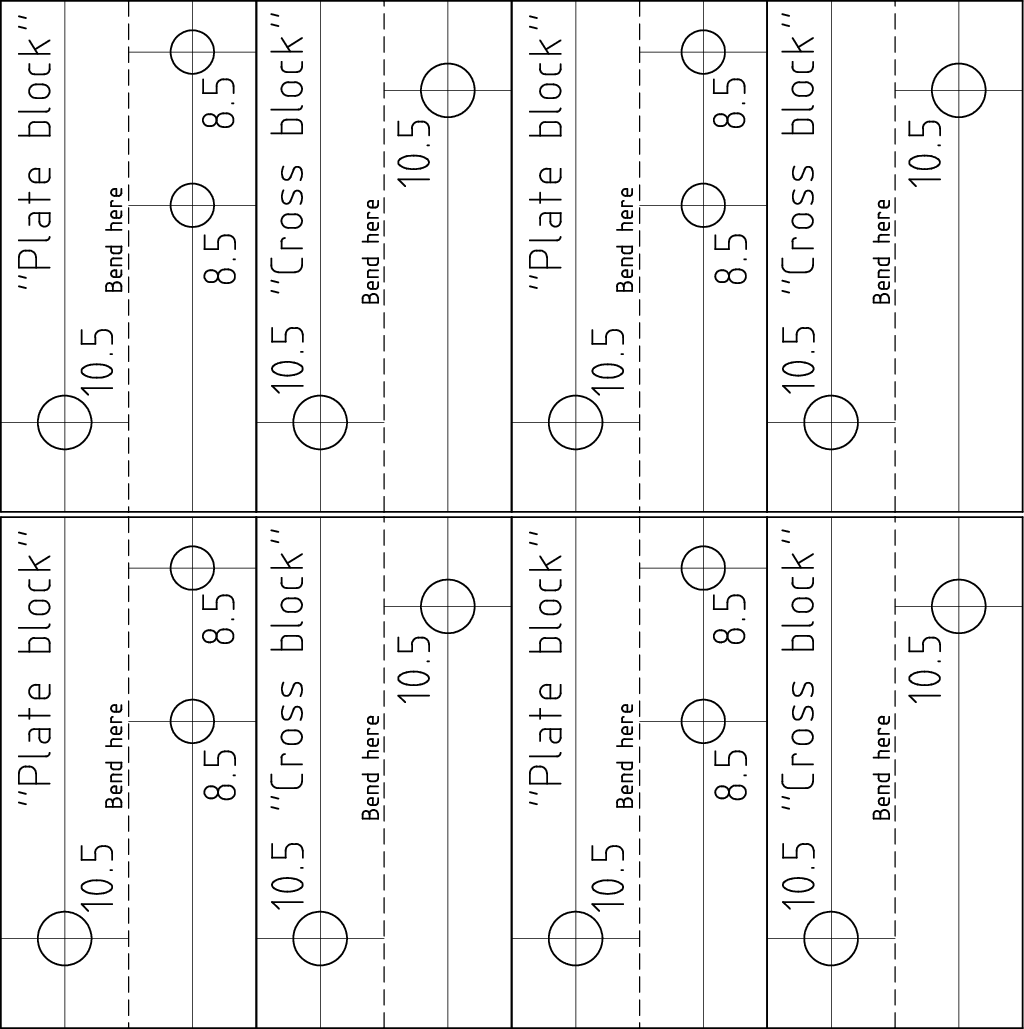
Blocks template
- If you have accurate printer, print out this template, otherwise jump to
the next box ("Drill out the plate").
- The template is for 4 identical plate block and 4 identical cross blocks,
you need only of each for a holder.
- The gap between the templates is suitable for a saw.
- Cut out the template and glue on the 25x25 square bar
![Gallery[1ce5]](http://images.twibright.com/tns/lvl1/1ce5.jpg) |
|
|
|
|
Drill out the cross and plate blocks. |
|
|
![Gallery[1318]](http://images.twibright.com/tns/lvl2/1318.jpg)
|
Rubber block drilling
Drill 8.5mm hole in each rubber block excentrically,
with center 10mm from the edge. Use 9.5mm or so drill bit.
|
|
|
|
Bang the blocks with a big hammer along the edges to bulge them out to cancel
out possible convexity of the sides.
|
|
|
Grinding burrs Grind the area around holes with emery
paper flat so that there are no burrs (they could creep under the bolt preload
with time). |
|
|
|
Parts to be washed and painted
- Quoin
- Plate
- Cross block
- Plate block
|
|
|
Cleaning
- Fill a bucket with hot water and add detergent, for dosage see the bottle
label
- Throw all pieces with templates into the bucket and let the templates soak
off.
-
Use emery paper to remove noncohesive rust from pieces
where templates weren't used.
- Wash parts to be washed plus parts already in water in the bucket using
a brush or sponge to get rid of all grease
- Place everything wet on a rag and dry with hairdrier while turning
around.
- Now remove noncohesive rust from pieces where templates were used.
|
|
|
|
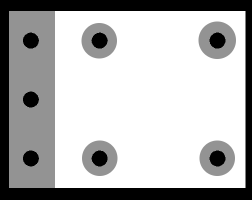
Critical zones
Critical zones for Plate are on the picture (from both sides).
The remaining pieces have them:
- plate block where plate will be attached (8.5mm holes)
- plate block where cross block will be attached (10.5mm holes)
- cross block where plate block will be attached (10.5mm holes)
- cross block where console will be attached (10.5mm holes)
- quoin where heel will be attached (6.5mm holes)
- quoin from inner side around the four 8.5mm holes
|
|
|
|
|
|
|
Assembly
Assemble the holder. Mirroring is insignificant (the holder can be
cofigured to accomodate particular situation). The 3D model shows
intermediate stage of assembly, the photo final assembly.
|
|
|
Accessories
Keep the rubber blocks, 3 M8x50 bolts
and 3 M8 jam nuts for future mounting.
|
|

 Contact, support: Clock
on the Internet Relay Chat.© 1998-2016 Karel ‘Clock’ Kulhavý et al..
Contact, support: Clock
on the Internet Relay Chat.© 1998-2016 Karel ‘Clock’ Kulhavý et al.. ![Gallery[13e4]](http://images.twibright.com/tns/lvl0/13e4.jpg)
![Gallery[13e5]](http://images.twibright.com/tns/lvl0/13e5.jpg)
![Gallery[13e6]](http://images.twibright.com/tns/lvl0/13e6.jpg)
![Gallery[13e7]](http://images.twibright.com/tns/lvl0/13e7.jpg)
![Gallery[114c]](http://images.twibright.com/tns/lvl0/114c.jpg)
![Gallery[114d]](http://images.twibright.com/tns/lvl0/114d.jpg)
![Gallery[13e8]](http://images.twibright.com/tns/lvl0/13e8.jpg)
![Gallery[13ea]](http://images.twibright.com/tns/lvl0/13ea.jpg)
![Gallery[1317]](http://images.twibright.com/tns/lvl0/1317.jpg)
![Gallery[131b]](http://images.twibright.com/tns/lvl0/131b.jpg)

![Gallery[1cde]](http://images.twibright.com/tns/lvl0/1cde.jpg)
![Gallery[1cdf]](http://images.twibright.com/tns/lvl0/1cdf.jpg)

![Gallery[1cea]](http://images.twibright.com/tns/lvl1/1cea.jpg)
![Gallery[1ceb]](http://images.twibright.com/tns/lvl1/1ceb.jpg)
![Gallery[1cec]](http://images.twibright.com/tns/lvl1/1cec.jpg)
![Gallery[580]](http://images.twibright.com/tns/lvl1/580.jpg)
![Gallery[581]](http://images.twibright.com/tns/lvl1/581.jpg)
![Gallery[582]](http://images.twibright.com/tns/lvl1/582.jpg)
![Gallery[583]](http://images.twibright.com/tns/lvl1/583.jpg)
![Gallery[584]](http://images.twibright.com/tns/lvl1/584.jpg)
![Gallery[1ce0]](http://images.twibright.com/tns/lvl1/1ce0.jpg)
![Gallery[1ce1]](http://images.twibright.com/tns/lvl1/1ce1.jpg)
![Gallery[1ce2]](http://images.twibright.com/tns/lvl1/1ce2.jpg)
![Gallery[1ce7]](http://images.twibright.com/tns/lvl1/1ce7.jpg)
![Gallery[1ce8]](http://images.twibright.com/tns/lvl1/1ce8.jpg)
![Gallery[1ce9]](http://images.twibright.com/tns/lvl1/1ce9.jpg)

![Gallery[1ce3]](http://images.twibright.com/tns/lvl0/1ce3.jpg)
![Gallery[1ce4]](http://images.twibright.com/tns/lvl0/1ce4.jpg)
![Gallery[1ce6]](http://images.twibright.com/tns/lvl0/1ce6.jpg)
![Gallery[1cfd]](http://images.twibright.com/tns/lvl0/1cfd.jpg)
![Gallery[1cfe]](http://images.twibright.com/tns/lvl0/1cfe.jpg)
![Gallery[576]](http://images.twibright.com/tns/lvl0/576.jpg)
![Gallery[577]](http://images.twibright.com/tns/lvl0/577.jpg)
![Gallery[578]](http://images.twibright.com/tns/lvl0/578.jpg)
![Gallery[579]](http://images.twibright.com/tns/lvl0/579.jpg)
![Gallery[57a]](http://images.twibright.com/tns/lvl0/57a.jpg)
![Gallery[1cee]](http://images.twibright.com/tns/lvl0/1cee.jpg)
![Gallery[1cef]](http://images.twibright.com/tns/lvl0/1cef.jpg)
![Gallery[1cf0]](http://images.twibright.com/tns/lvl0/1cf0.jpg)
![Gallery[1ced]](http://images.twibright.com/tns/lvl0/1ced.jpg)
![Gallery[1d01]](http://images.twibright.com/tns/lvl1/1d01.jpg)
![Gallery[1d02]](http://images.twibright.com/tns/lvl1/1d02.jpg)
![Gallery[1cf2]](http://images.twibright.com/tns/lvl0/1cf2.jpg)
![Gallery[1cf3]](http://images.twibright.com/tns/lvl0/1cf3.jpg)
![Gallery[1cf4]](http://images.twibright.com/tns/lvl0/1cf4.jpg)
![Gallery[1cf5]](http://images.twibright.com/tns/lvl0/1cf5.jpg)
![Gallery[1cf6]](http://images.twibright.com/tns/lvl0/1cf6.jpg)
![Gallery[1cf7]](http://images.twibright.com/tns/lvl0/1cf7.jpg)
![Gallery[1cf8]](http://images.twibright.com/tns/lvl0/1cf8.jpg)
![Gallery[1cf9]](http://images.twibright.com/tns/lvl0/1cf9.jpg)
![Gallery[1cfa]](http://images.twibright.com/tns/lvl0/1cfa.jpg)
![Gallery[1cfb]](http://images.twibright.com/tns/lvl0/1cfb.jpg)
![Gallery[1cfc]](http://images.twibright.com/tns/lvl0/1cfc.jpg)
![3d/holder [0]](/3d/holder_0.png)
![3d/holder [1]](/3d/holder_1.png)
![3d/holder [2]](/3d/holder_2.png)
![3d/holder [3]](/3d/holder_3.png)
![3d/holder [4]](/3d/holder_4.png)
