Cut two pieces from M10 threaded bars. Length is length of the
chimney between the sections + 100mm. If the bars are too short, they will be
extended using union nuts and in this case cut only the shortest piece. |
|
|
|
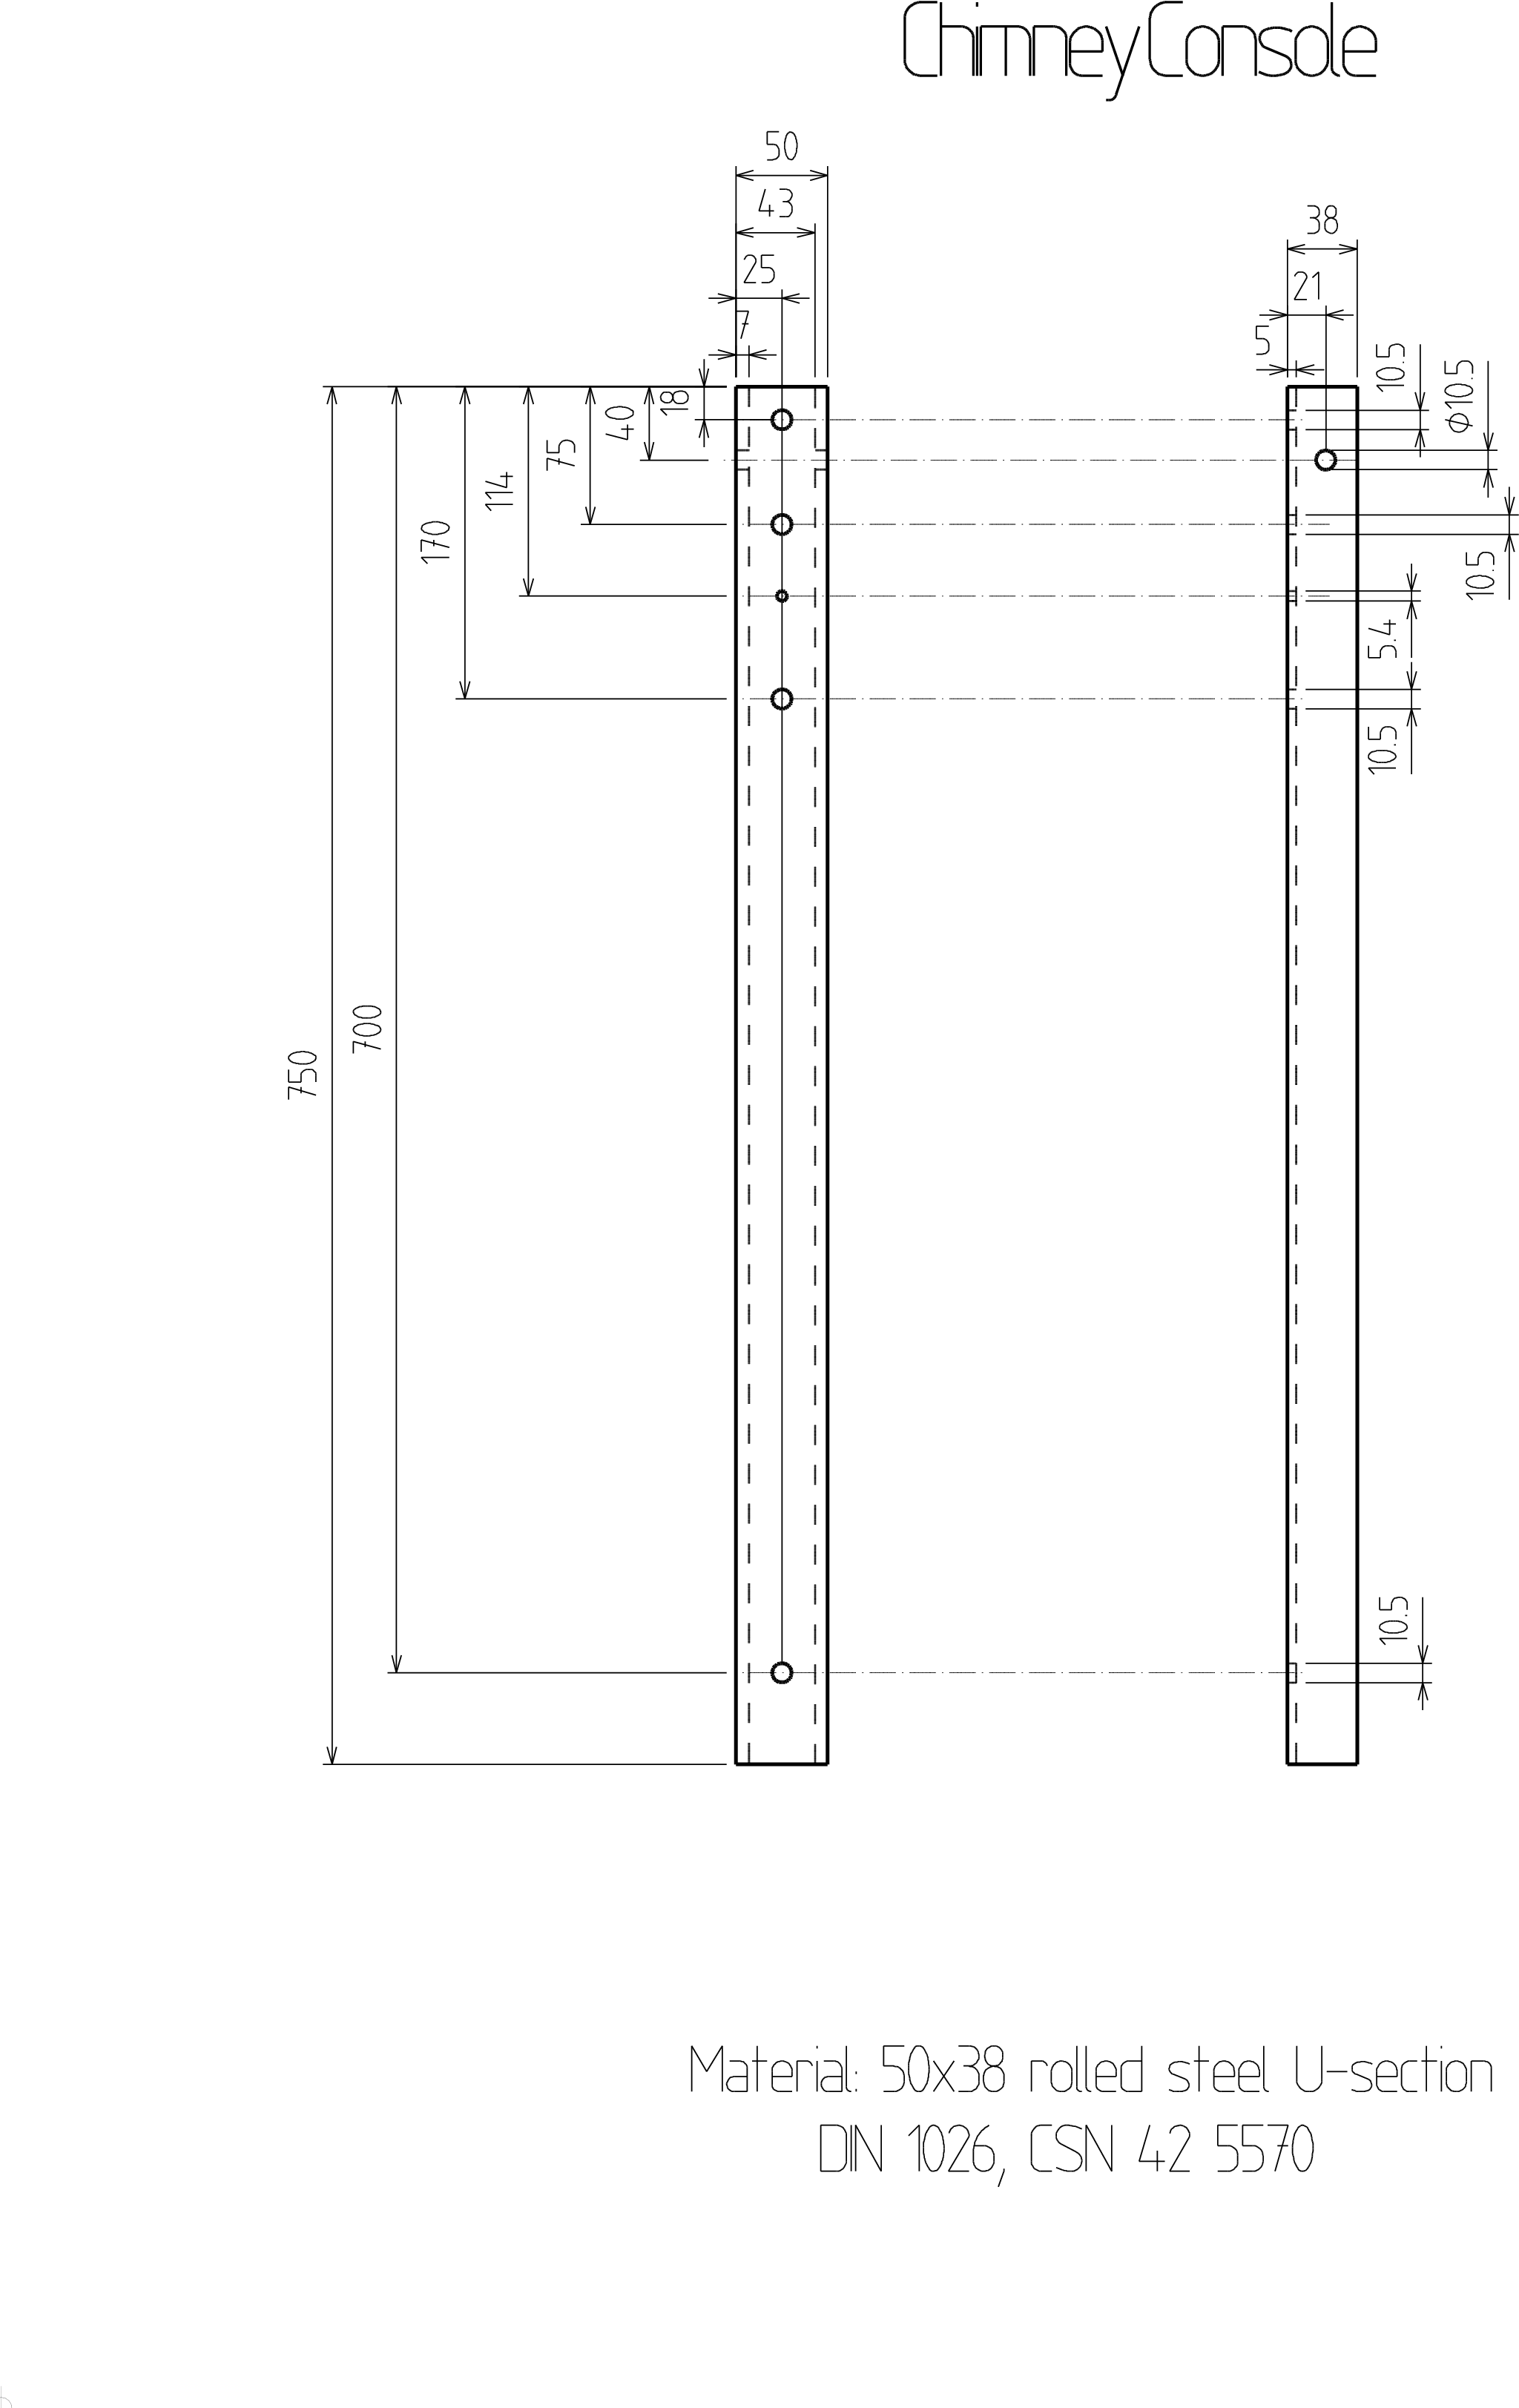
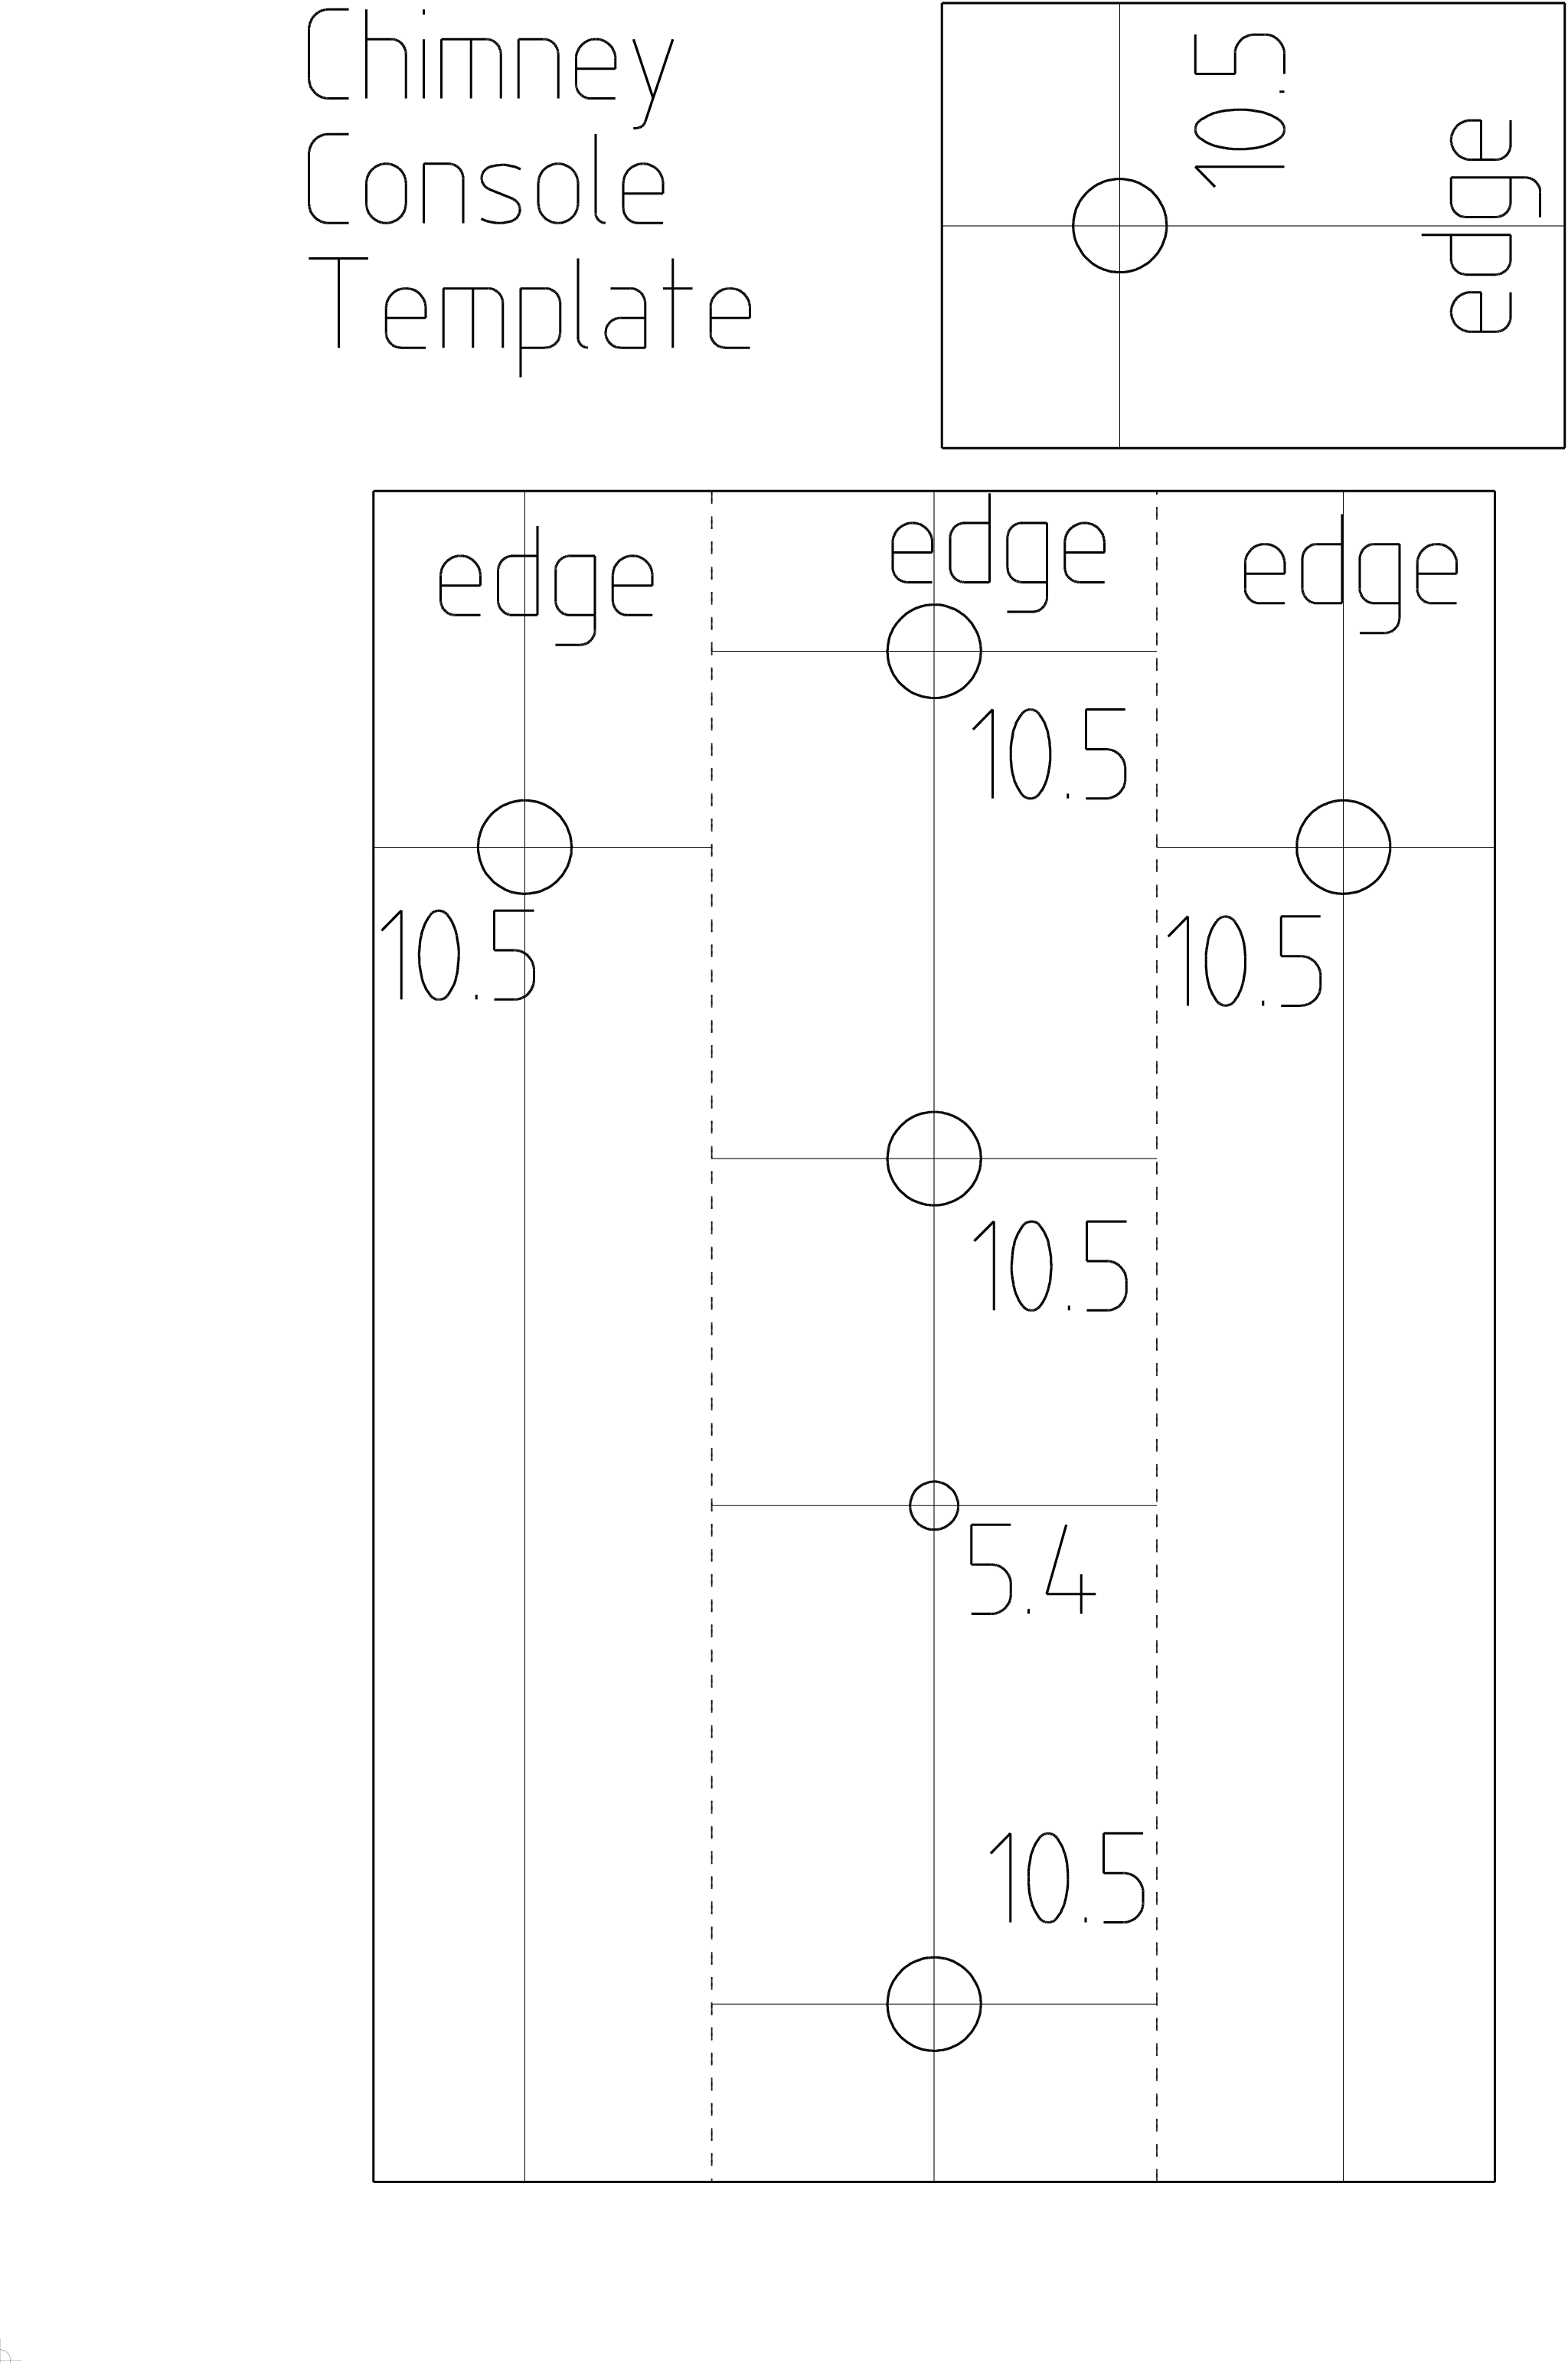
What we are going to drill |
|
|
|
|
Drilling
If you have an accurate printer, print out two templates, shear out, bend
in dashed lines and glue to the U sections.
Drill out according to the above plan. |
|
|
|
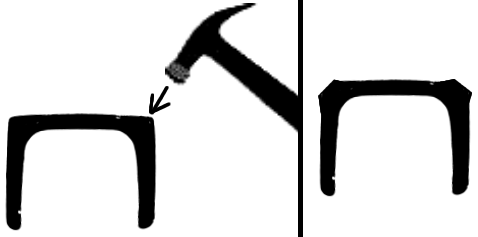
Treating edges
Bang the
U section with a big hammer along the edges to bulge them out to cancel
out possible convexity of the central side of the U. |
|
|
Painting
Paint the steel section for outdoor - base anti-corrosive paint and top
paint. |
|
|
|
Grounding cable eyelet
Remember that when you are going to install a grounding cable eyelet to this
console, it will be done this way. Install the bolt, nut and toothed spring
washer without the eyelet for this time. |
|
|
Assembly
Install the two M10 bolts with M10 nuts
and spring washers but do not tighten them. The M10 bolts are for interfacing
the universal holder. |
|
Very long thread bars If there are to be used more that a
meter of thread bars, connected them with union nuts. |
|

 Contact, support: Clock
on the Internet Relay Chat.© 1998-2016 Karel ‘Clock’ Kulhavý et al..
Contact, support: Clock
on the Internet Relay Chat.© 1998-2016 Karel ‘Clock’ Kulhavý et al.. 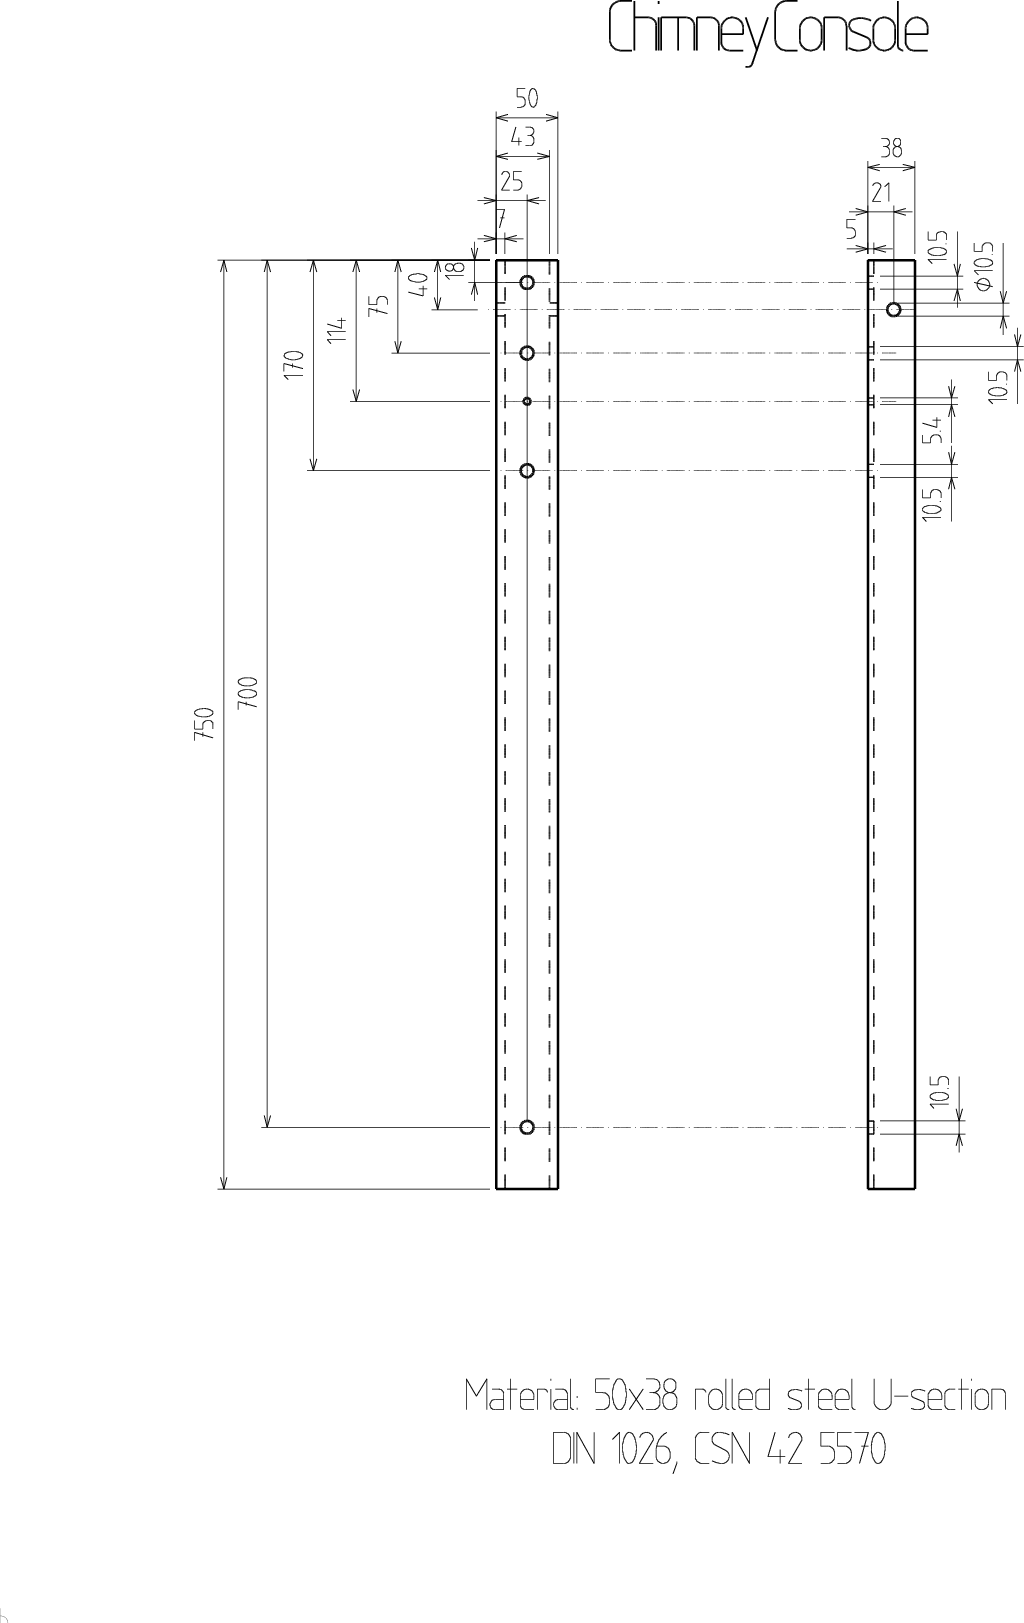

