| Cut four pieces of M10 thread bar with length 70mm+railing thickness |
|
 |
We are gonna build two identical metal assemblies. Each assembly will
consists of two not identical U-profiles. The profiles within each assembly will be connected together using two thread bars and this way form a tight clamp around
the railing. |
|
|
|
|
Drilling long piece
Drill the long piece as indicated in the drawing. |
|
|
|
|
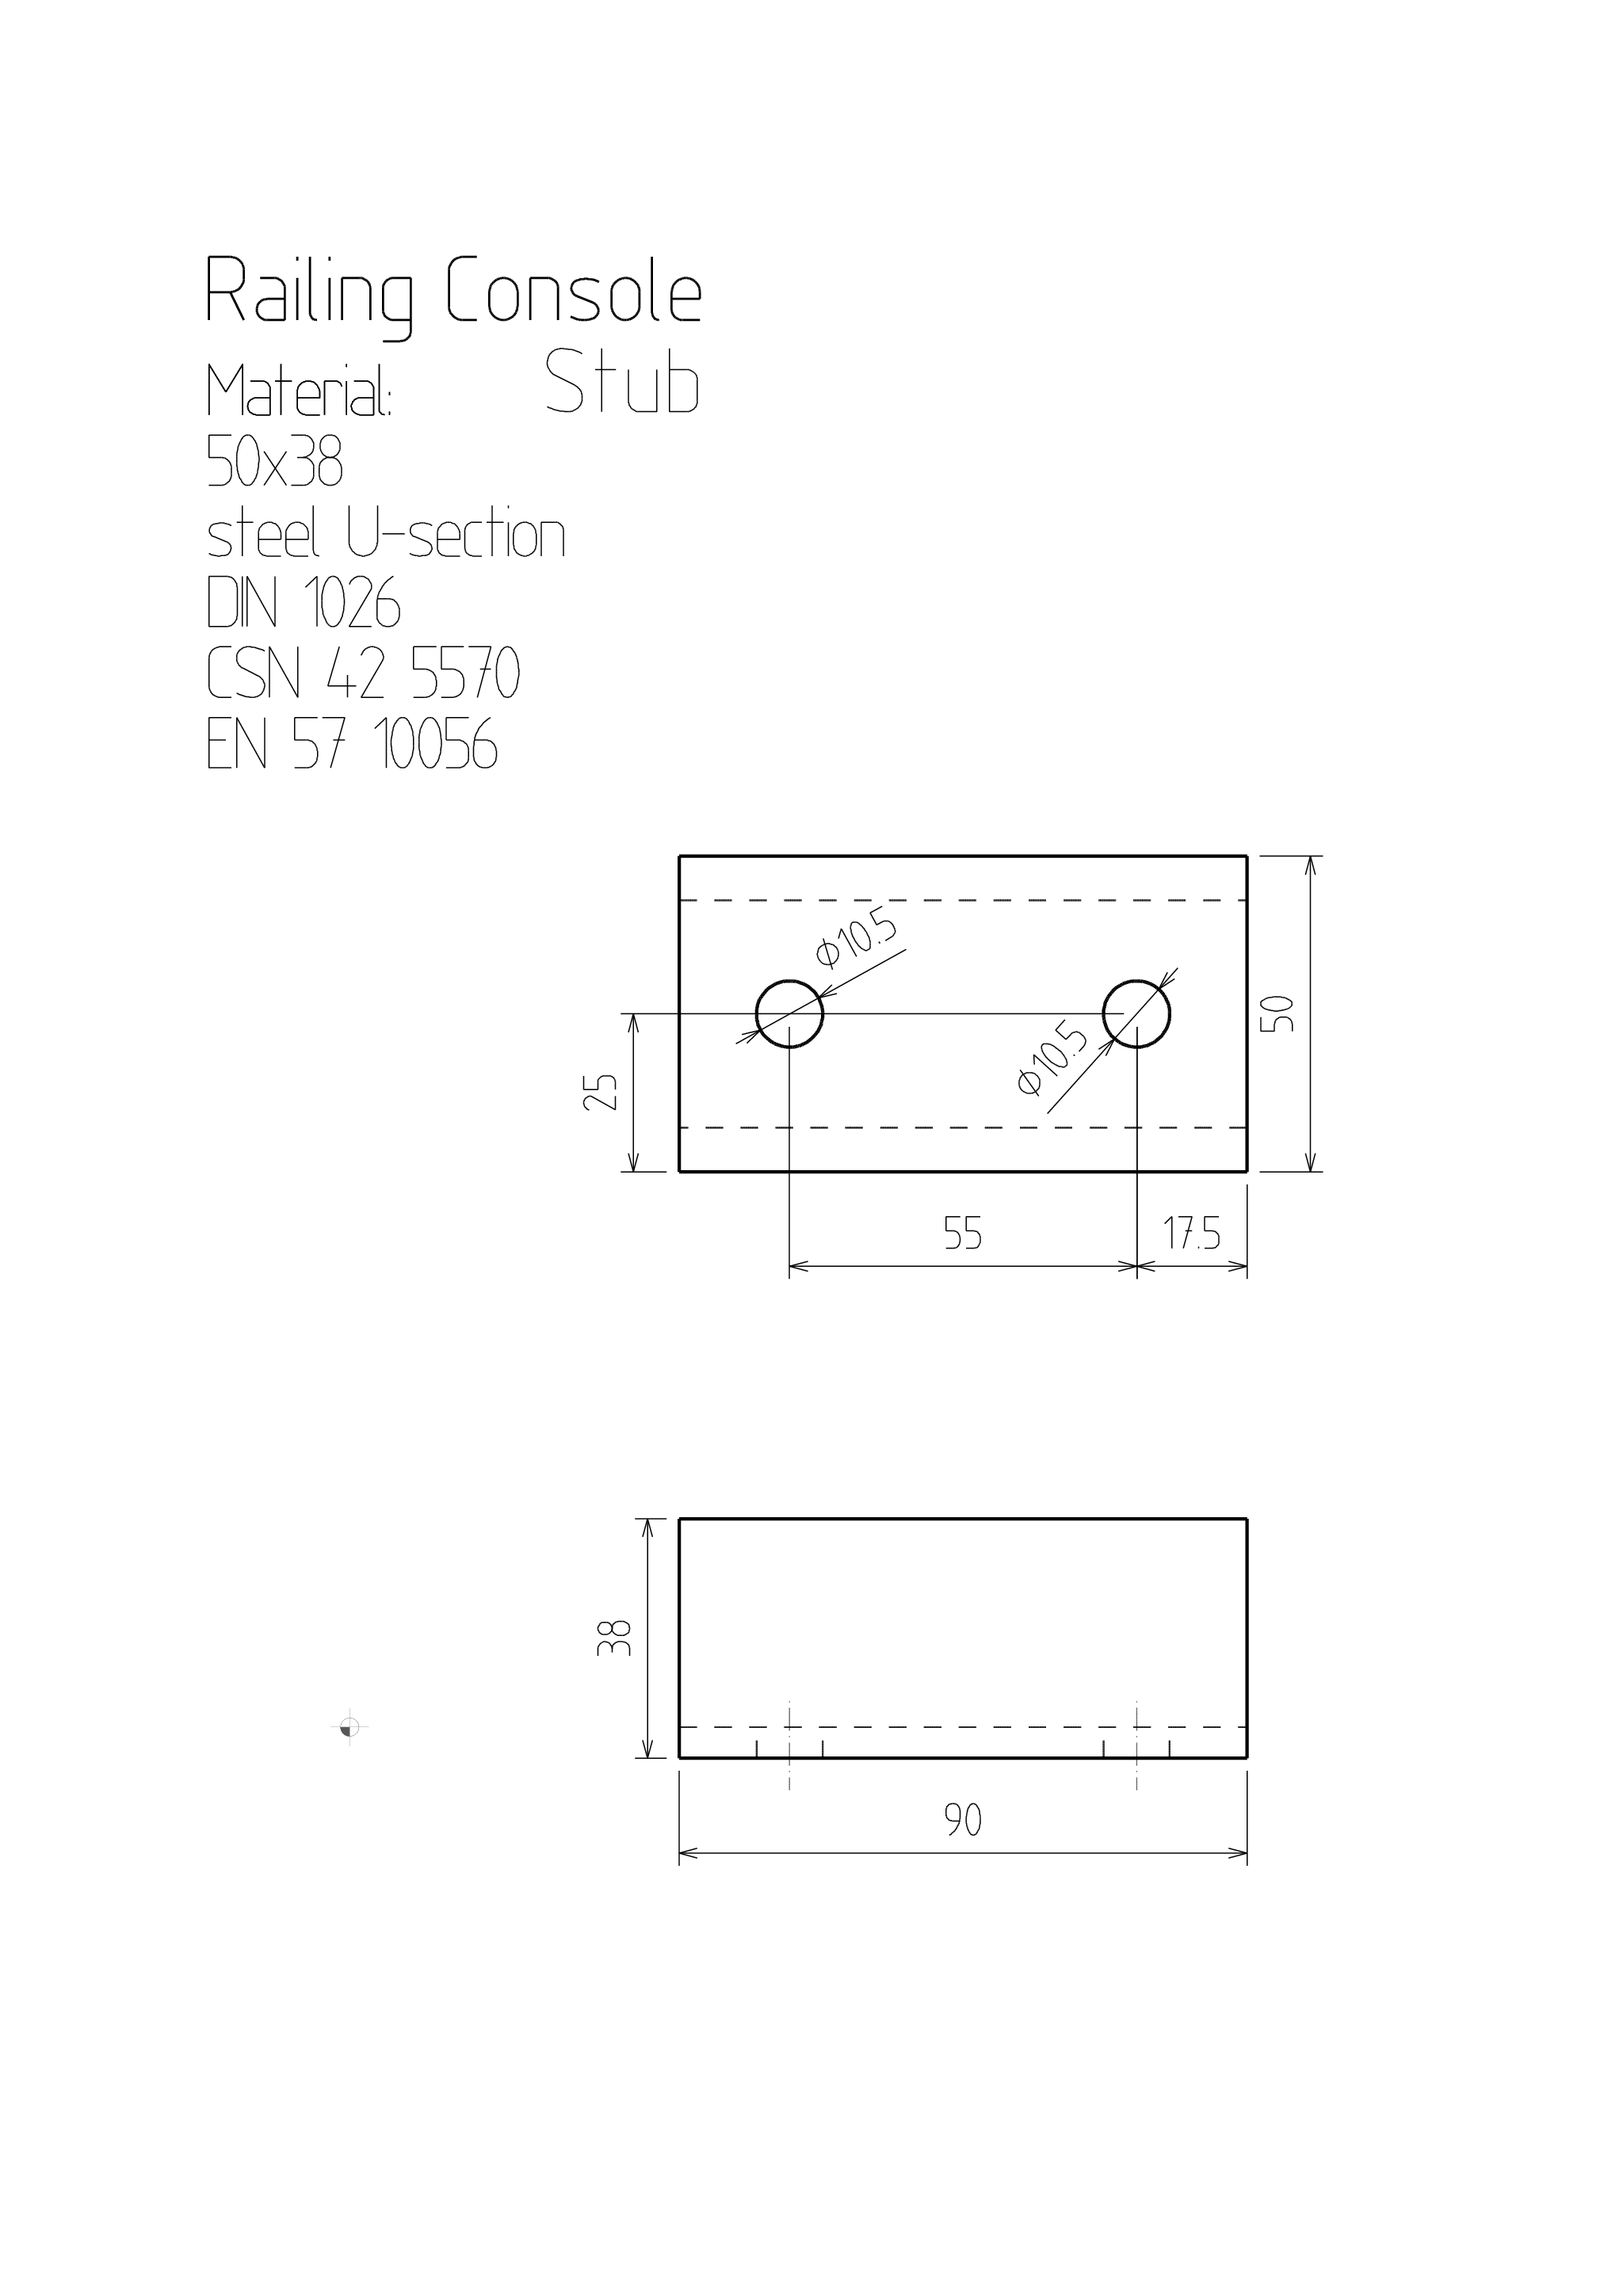
Drilling short piece
Drill the short piece as indicated in the drawing. |
|
|
|
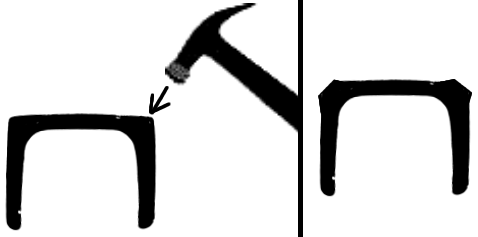
Banging
Bang the U section (only the longer pieces) along the edges with a big hammer
to bulge the edges and thus cancel out any convexity on the middle face of the
U section |
|
|
Painting
- Paint the steel sections: two layers of primer and two layers of top coat.
- Remove the paint around the holes which are on long pieces and are not on
the short pieces. using emery paper. The holder will sit on it and the paint
must not get between.
|
|
|
|
Assembly
Assemble the console according to the 3D model. The model shows only
one piece of two identical ones. |
|
|
|
| | Mounting
The console will be mounted on the railing this way. | |

 Contact, support: Clock
on the Internet Relay Chat.© 1998-2016 Karel ‘Clock’ Kulhavý et al..
Contact, support: Clock
on the Internet Relay Chat.© 1998-2016 Karel ‘Clock’ Kulhavý et al.. 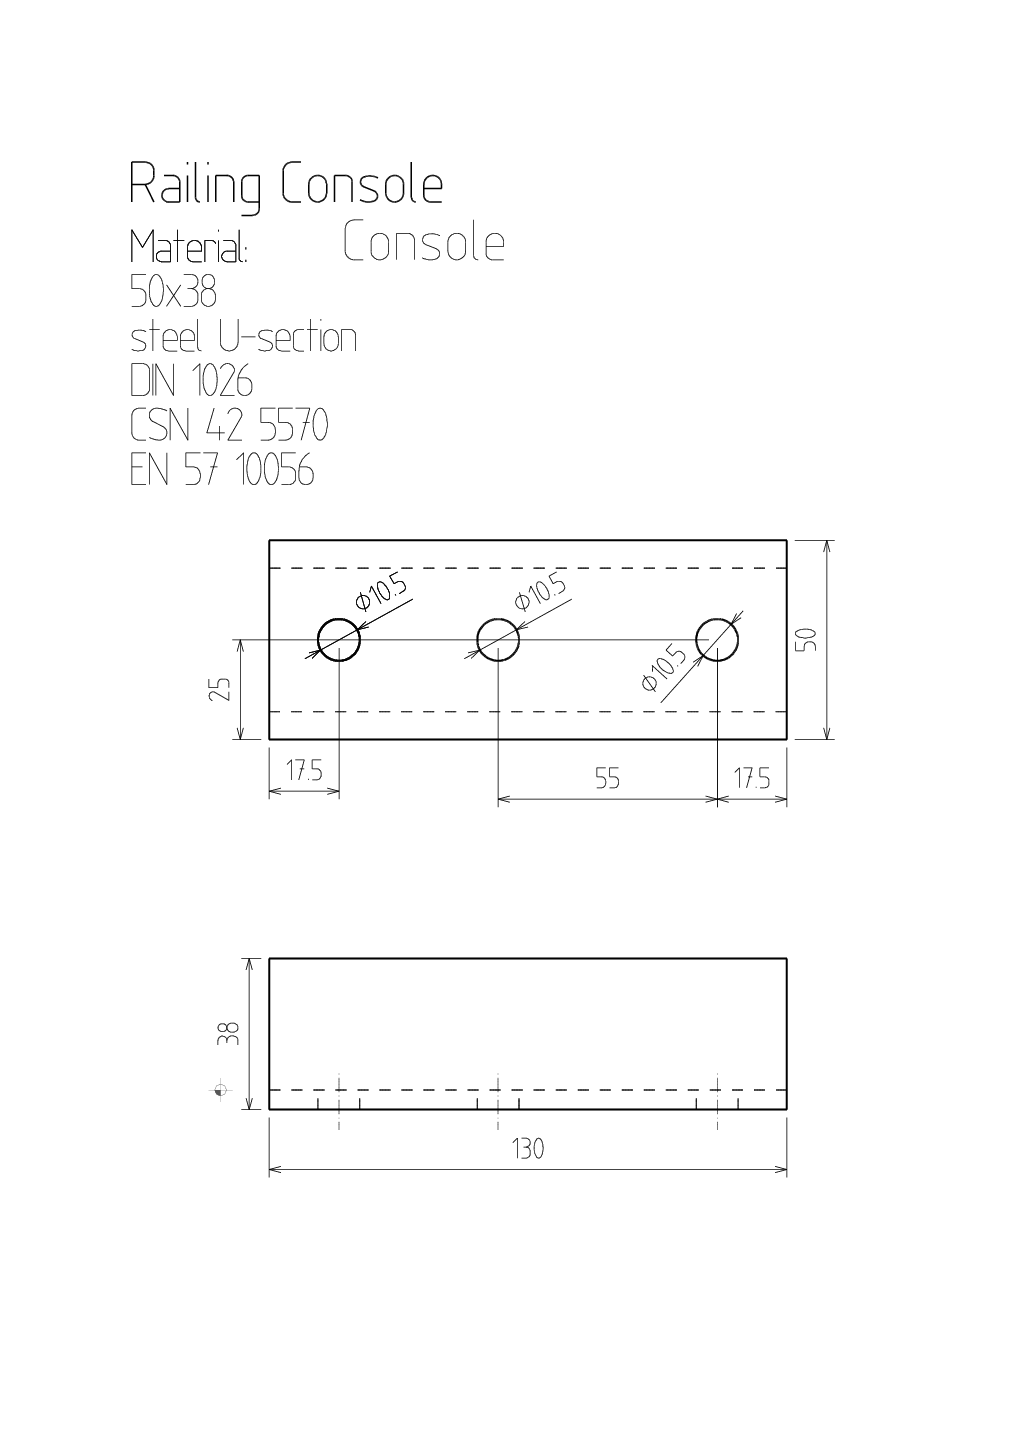

![3d/railing [0]](/3d/railing_0.png)
![3d/railing [1]](/3d/railing_1.png)
![3d/railing [2]](/3d/railing_2.png)
![3d/railing [3]](/3d/railing_3.png)
![3d/railing [4]](/3d/railing_4.png)

![3d/railing2 [0]](/3d/railing2_0.png)
![3d/railing2 [1]](/3d/railing2_1.png)
![3d/railing2 [2]](/3d/railing2_2.png)
![3d/railing2 [3]](/3d/railing2_3.png)
![3d/railing2 [4]](/3d/railing2_4.png)
