|
|
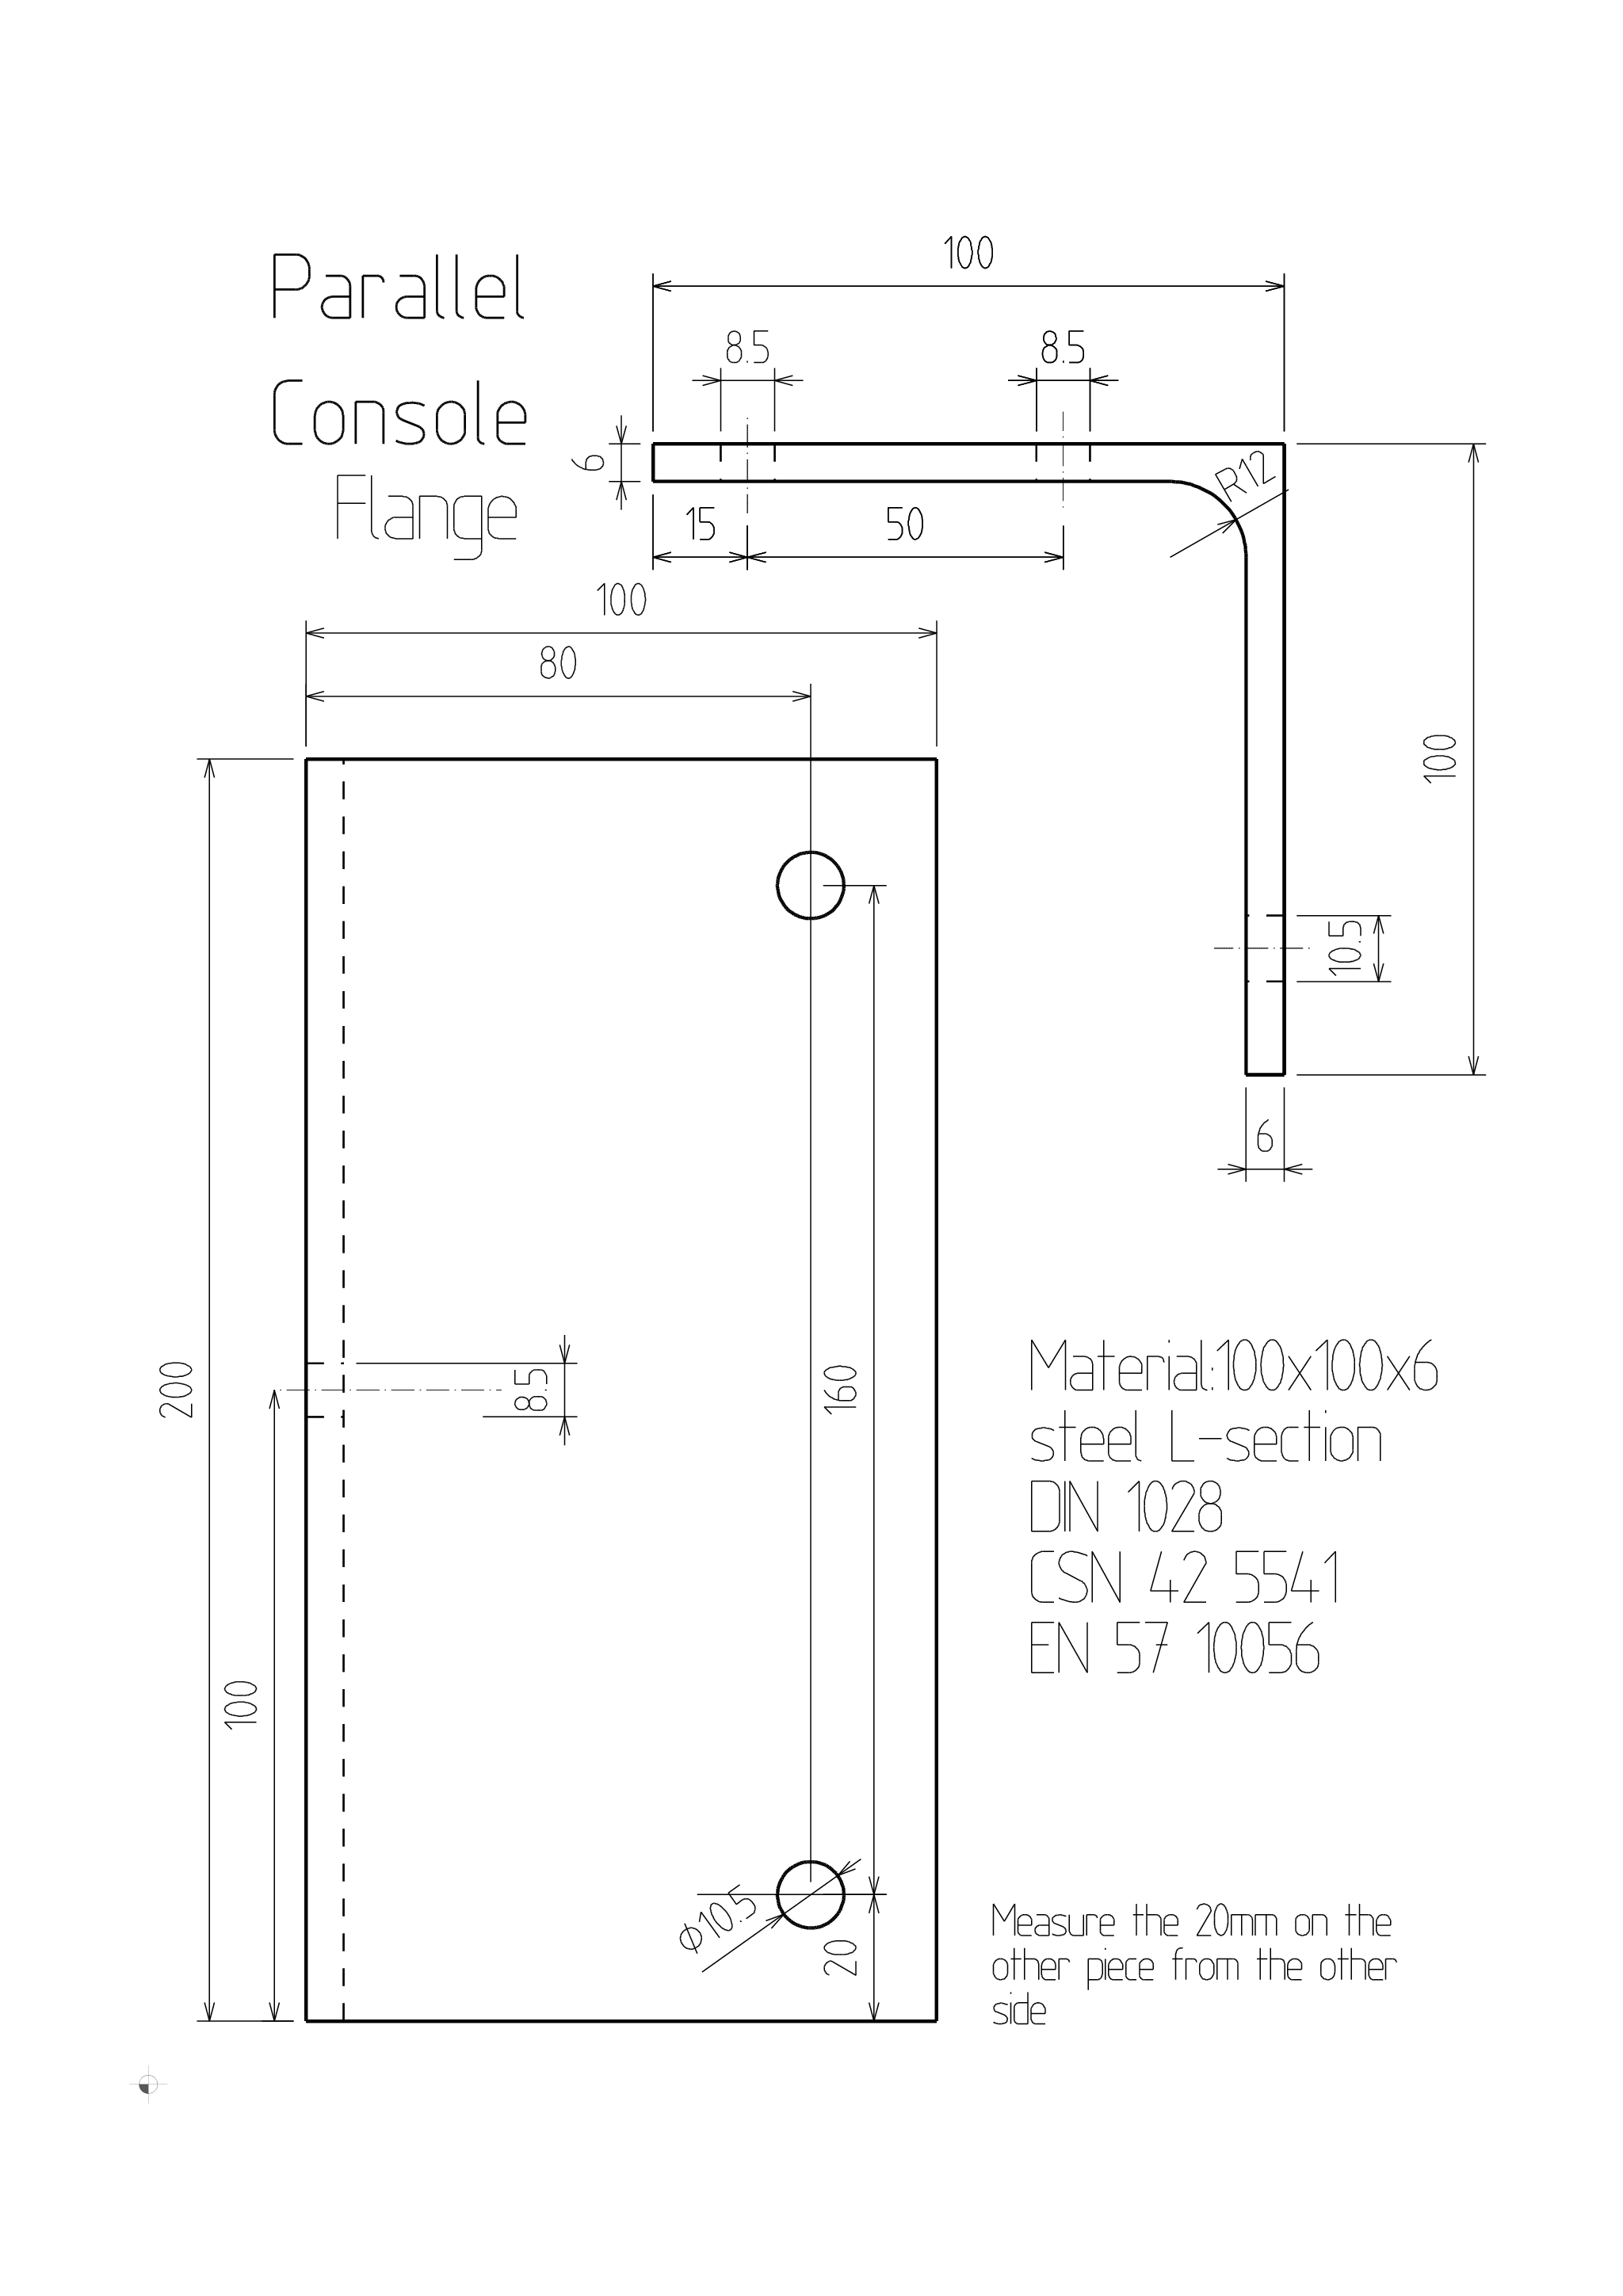
Drill the holes into the L sections
as specified in the drawing. |
|
|
|
|
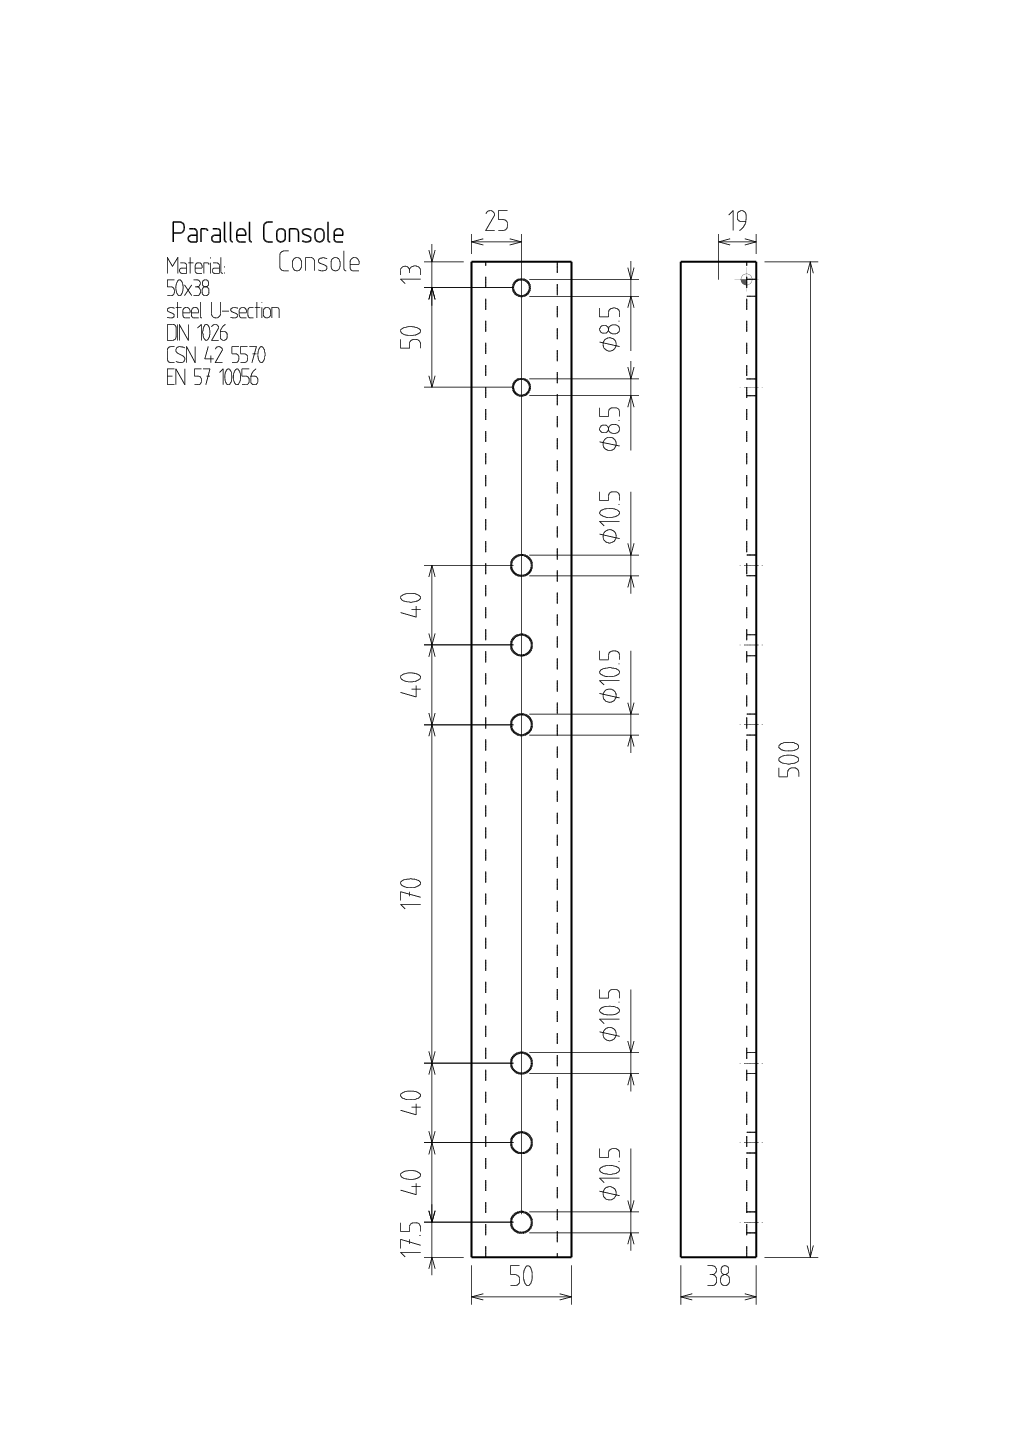
Drill the holes into the U section as specified in the drawing. |
|
|
Paint the steel sections with two layers of primer and two layers
of top coat. |
|
|
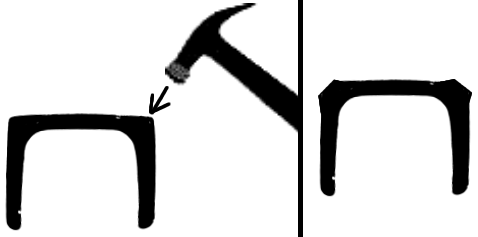
Bang the U section with a big hammer
along the edges to bulge them out to cancel out possible convexity of the
central side of the U. |
|
|
Remove the paint around the 10.5mm holes with an emery paper. |
|
|
|
Assembly Assemble the console using
two M8x35 galvanized bolts with two galvanized M8 spring washers and two
galvanized M8 nuts, but tighten only mildly. Put the spring washers under the
nut, not under the bolt's head. Install the two M10 bolts with M10 nuts and
spring washers but do not tighten them. The M10 bolts are for interfacing the
universal holder. |
|
|
 |
Console with 2 holders
Look here what the console and two holders look like.
Note: the
depicted blue console has obsolete geometry. |
|
|
|
|
Usage
Here you can see how the console is used together with 2 universal
holders and 2 optical heads. |
|
|

 Contact, support: Clock
on the Internet Relay Chat.© 1998-2016 Karel ‘Clock’ Kulhavý et al..
Contact, support: Clock
on the Internet Relay Chat.© 1998-2016 Karel ‘Clock’ Kulhavý et al.. 
![3d/parallel [0]](/3d/parallel_0.png)
![3d/parallel [1]](/3d/parallel_1.png)
![3d/parallel [2]](/3d/parallel_2.png)
![3d/parallel [3]](/3d/parallel_3.png)
![3d/parallel [4]](/3d/parallel_4.png)

![Gallery[4ab]](http://images.twibright.com/tns/lvl0/4ab.jpg)
![Gallery[4ac]](http://images.twibright.com/tns/lvl0/4ac.jpg)
![Gallery[634]](http://images.twibright.com/tns/lvl1/634.jpg)
![Gallery[639]](http://images.twibright.com/tns/lvl1/639.jpg)
![Gallery[1137]](http://images.twibright.com/tns/lvl1/1137.jpg)