Print out necessary manuals for the following modules. Then
proceed in building according to them, crossing over each step you have done by
pencil.
|
|
Optional: grinding the PIN diode
If you can't get suitable flat-top PIN diode, then take a dome-top
one (SFH203 or BPW43 for example) and grind the dome down to a flat surface.
- Make a suitable metal holder for the diode with a hole and a screwed clamp
- User underwater emery papers under water starting with number 80 and
ending with 2500: 80, 120, 200, 400, 800, 1200, 2500 or similar series
- In each step use microscope to ensure the surface roughness is even
(that there aren't traces of rough traces from the previous stage)
- In each step wash thoroughly to ensure all abrasive from the previous
stage gets washed out from the slot between the LED and the holder. Otherwise
the surface will be scratched and you'll be unable to polish it
- After 2500, polish with a polishing fluid for glass, brass etc.
- Then unmount from the holder and wash and wipe with soft cloth
|
|
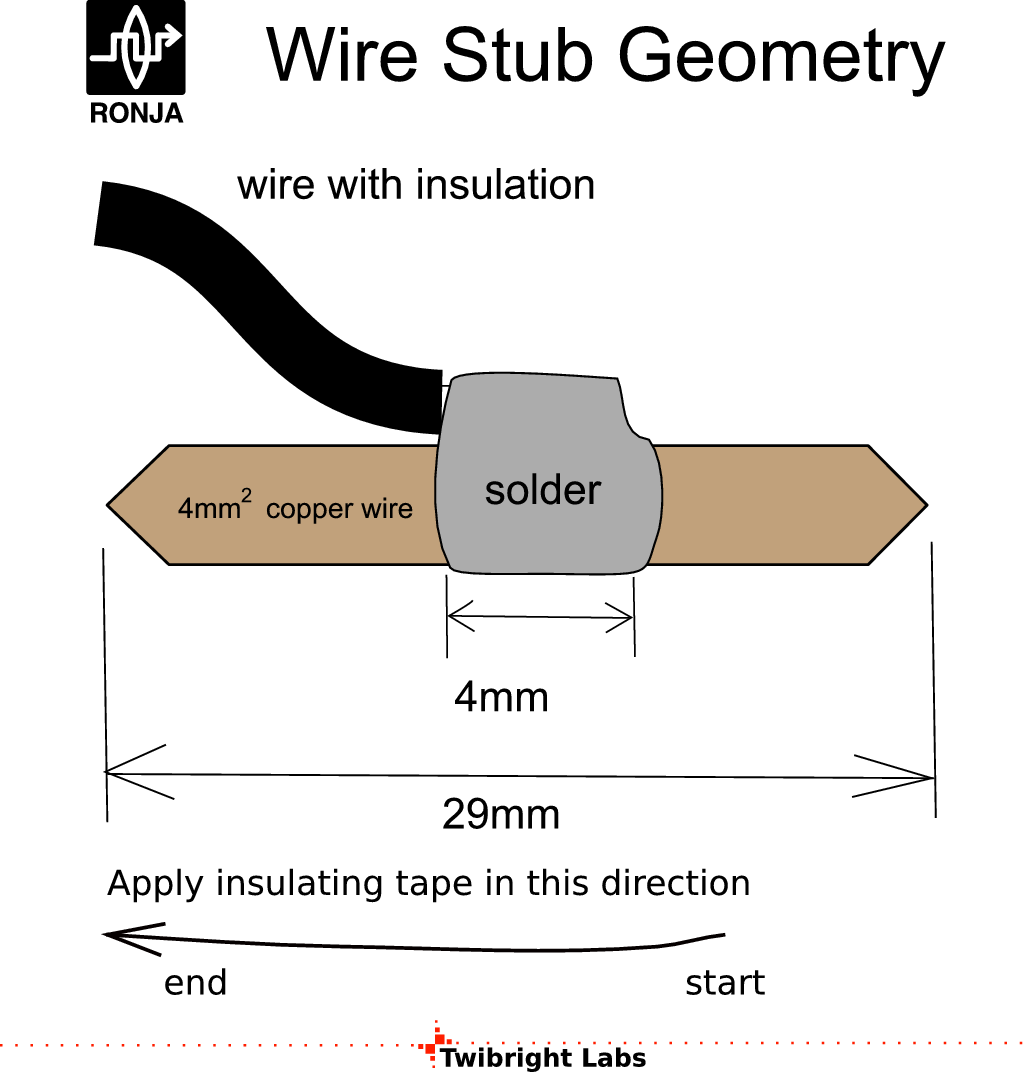
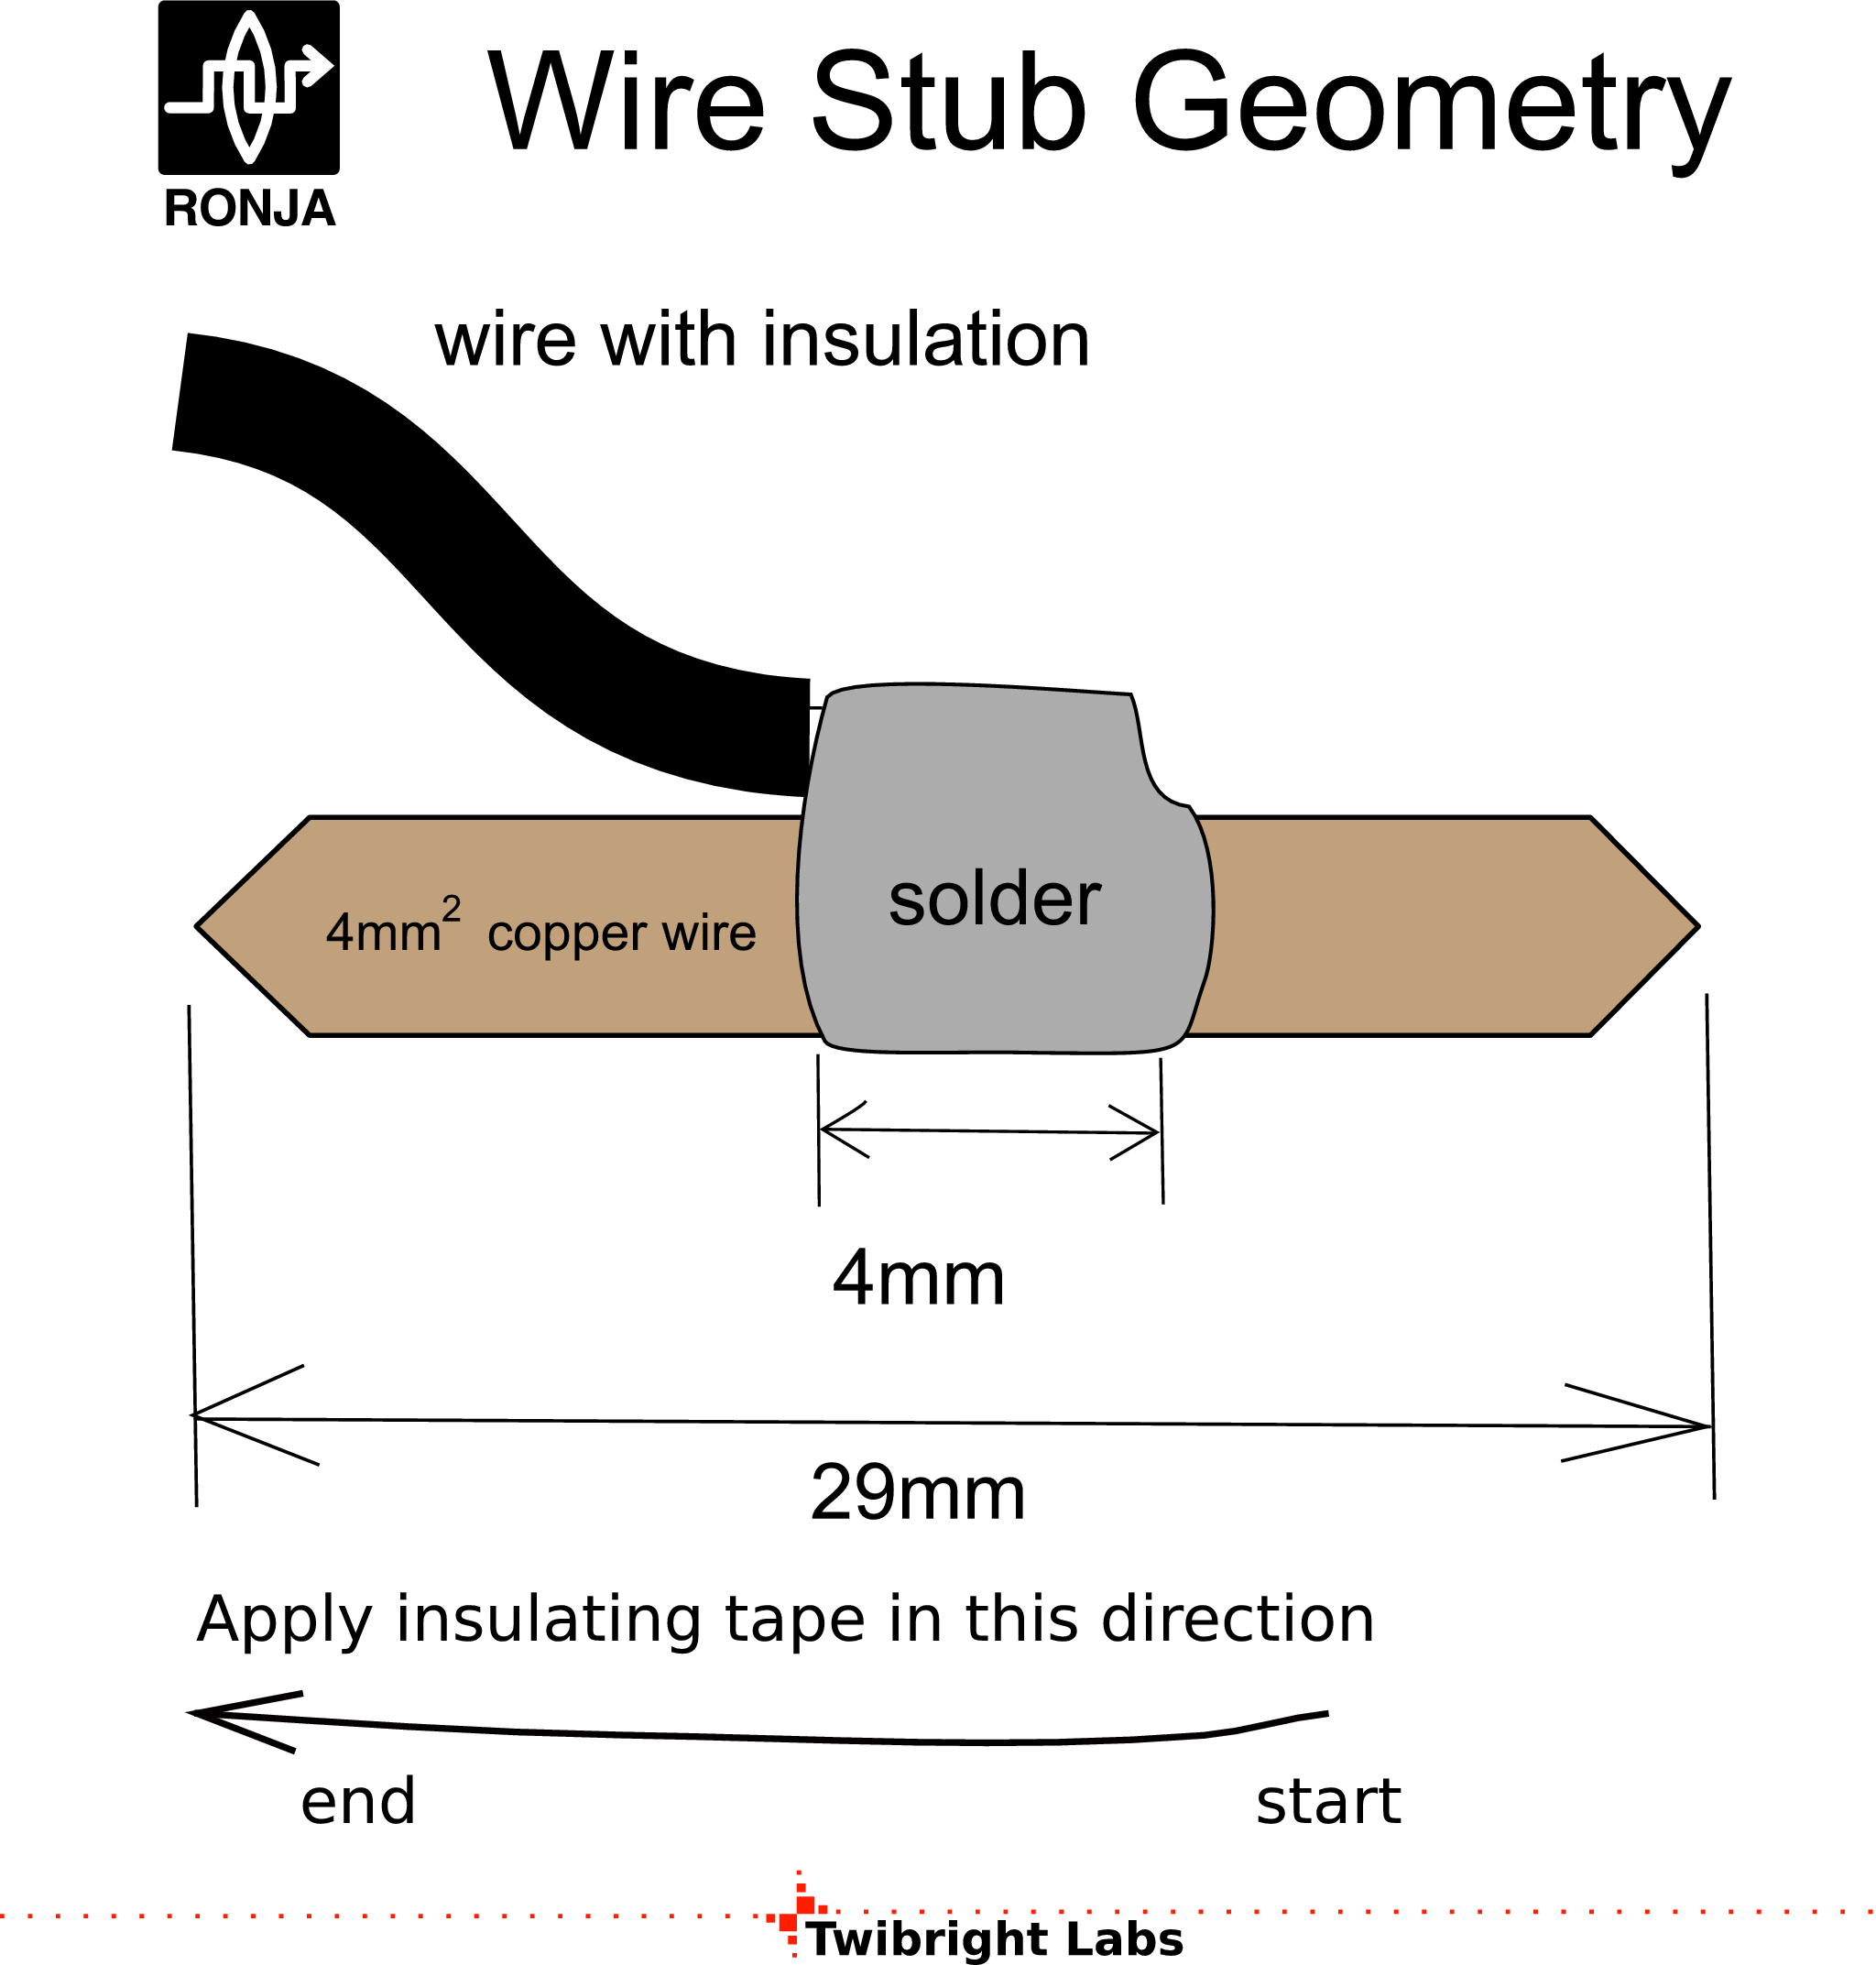
Cutting stubs
Cut 6 pieces from 4mm^2 insulated copper hard wire. Length = 29mm. |
|
|
|
Soldering stubs
- Solder 2 stubs on one end of 2m shielded cable
- Cut both 5m pieces of wire in half. You get 2 red and 2 black wires.
- Solder 1 stub on one end of each single-wire of the 2 black and 2 red
(so that remaining 4 stubs are used).
|
|
|
|
|
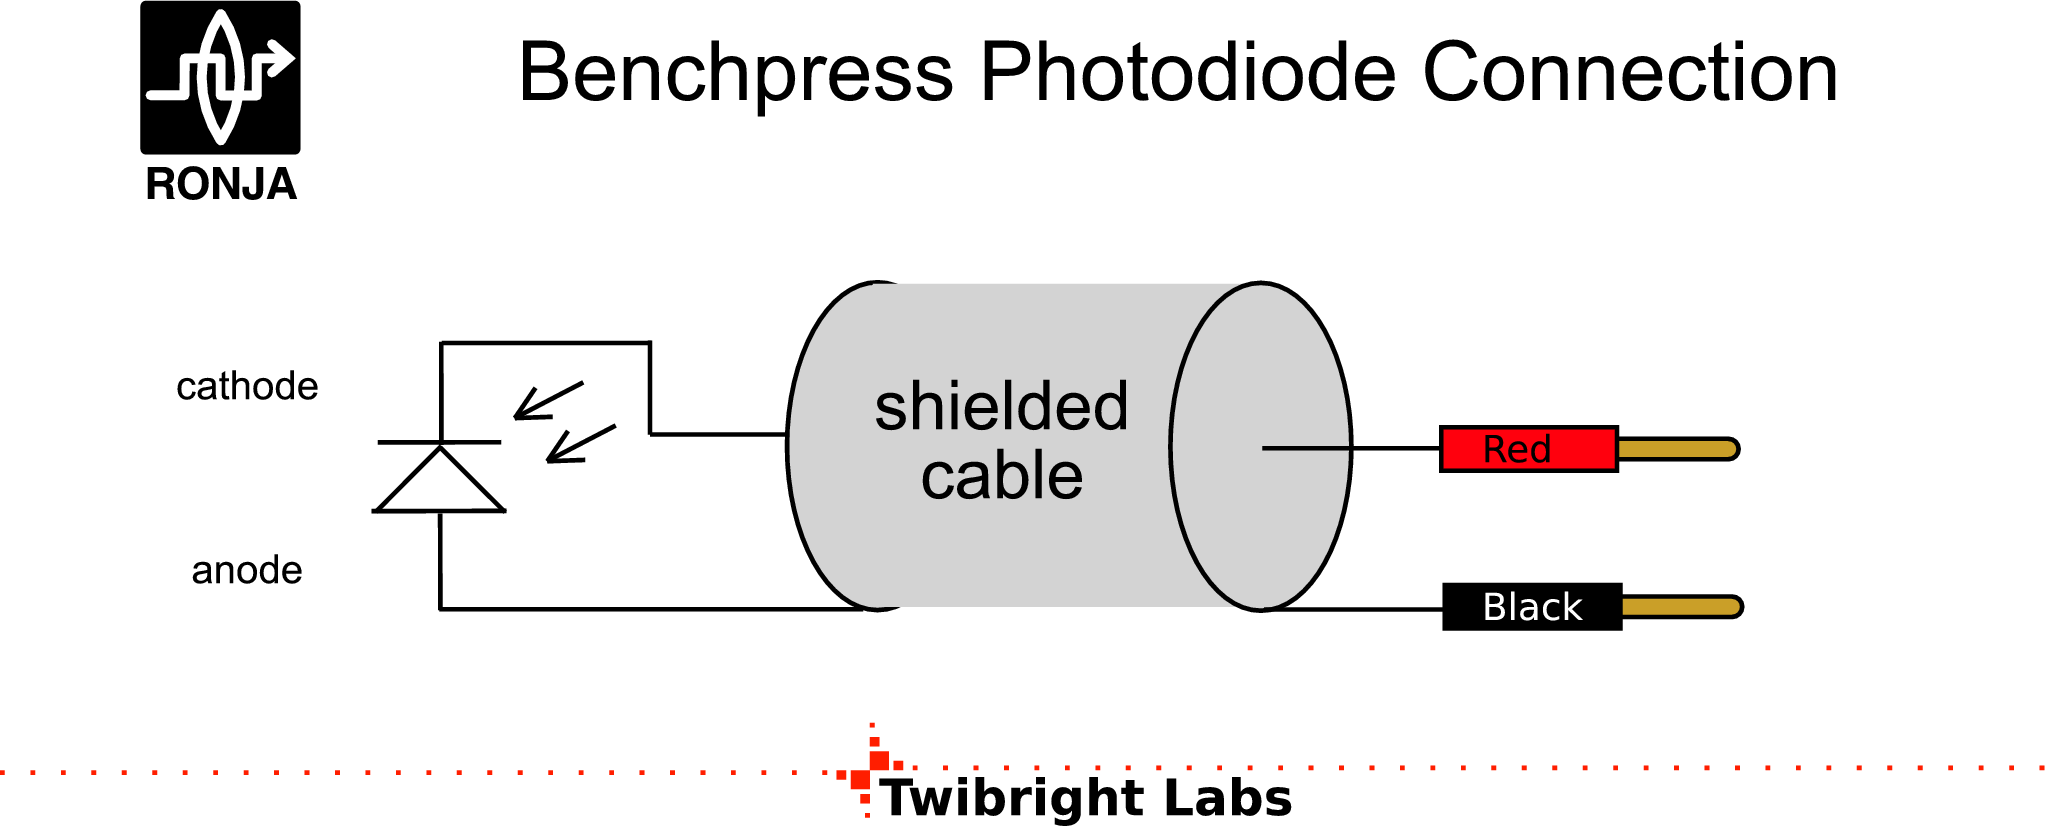
Photodiode
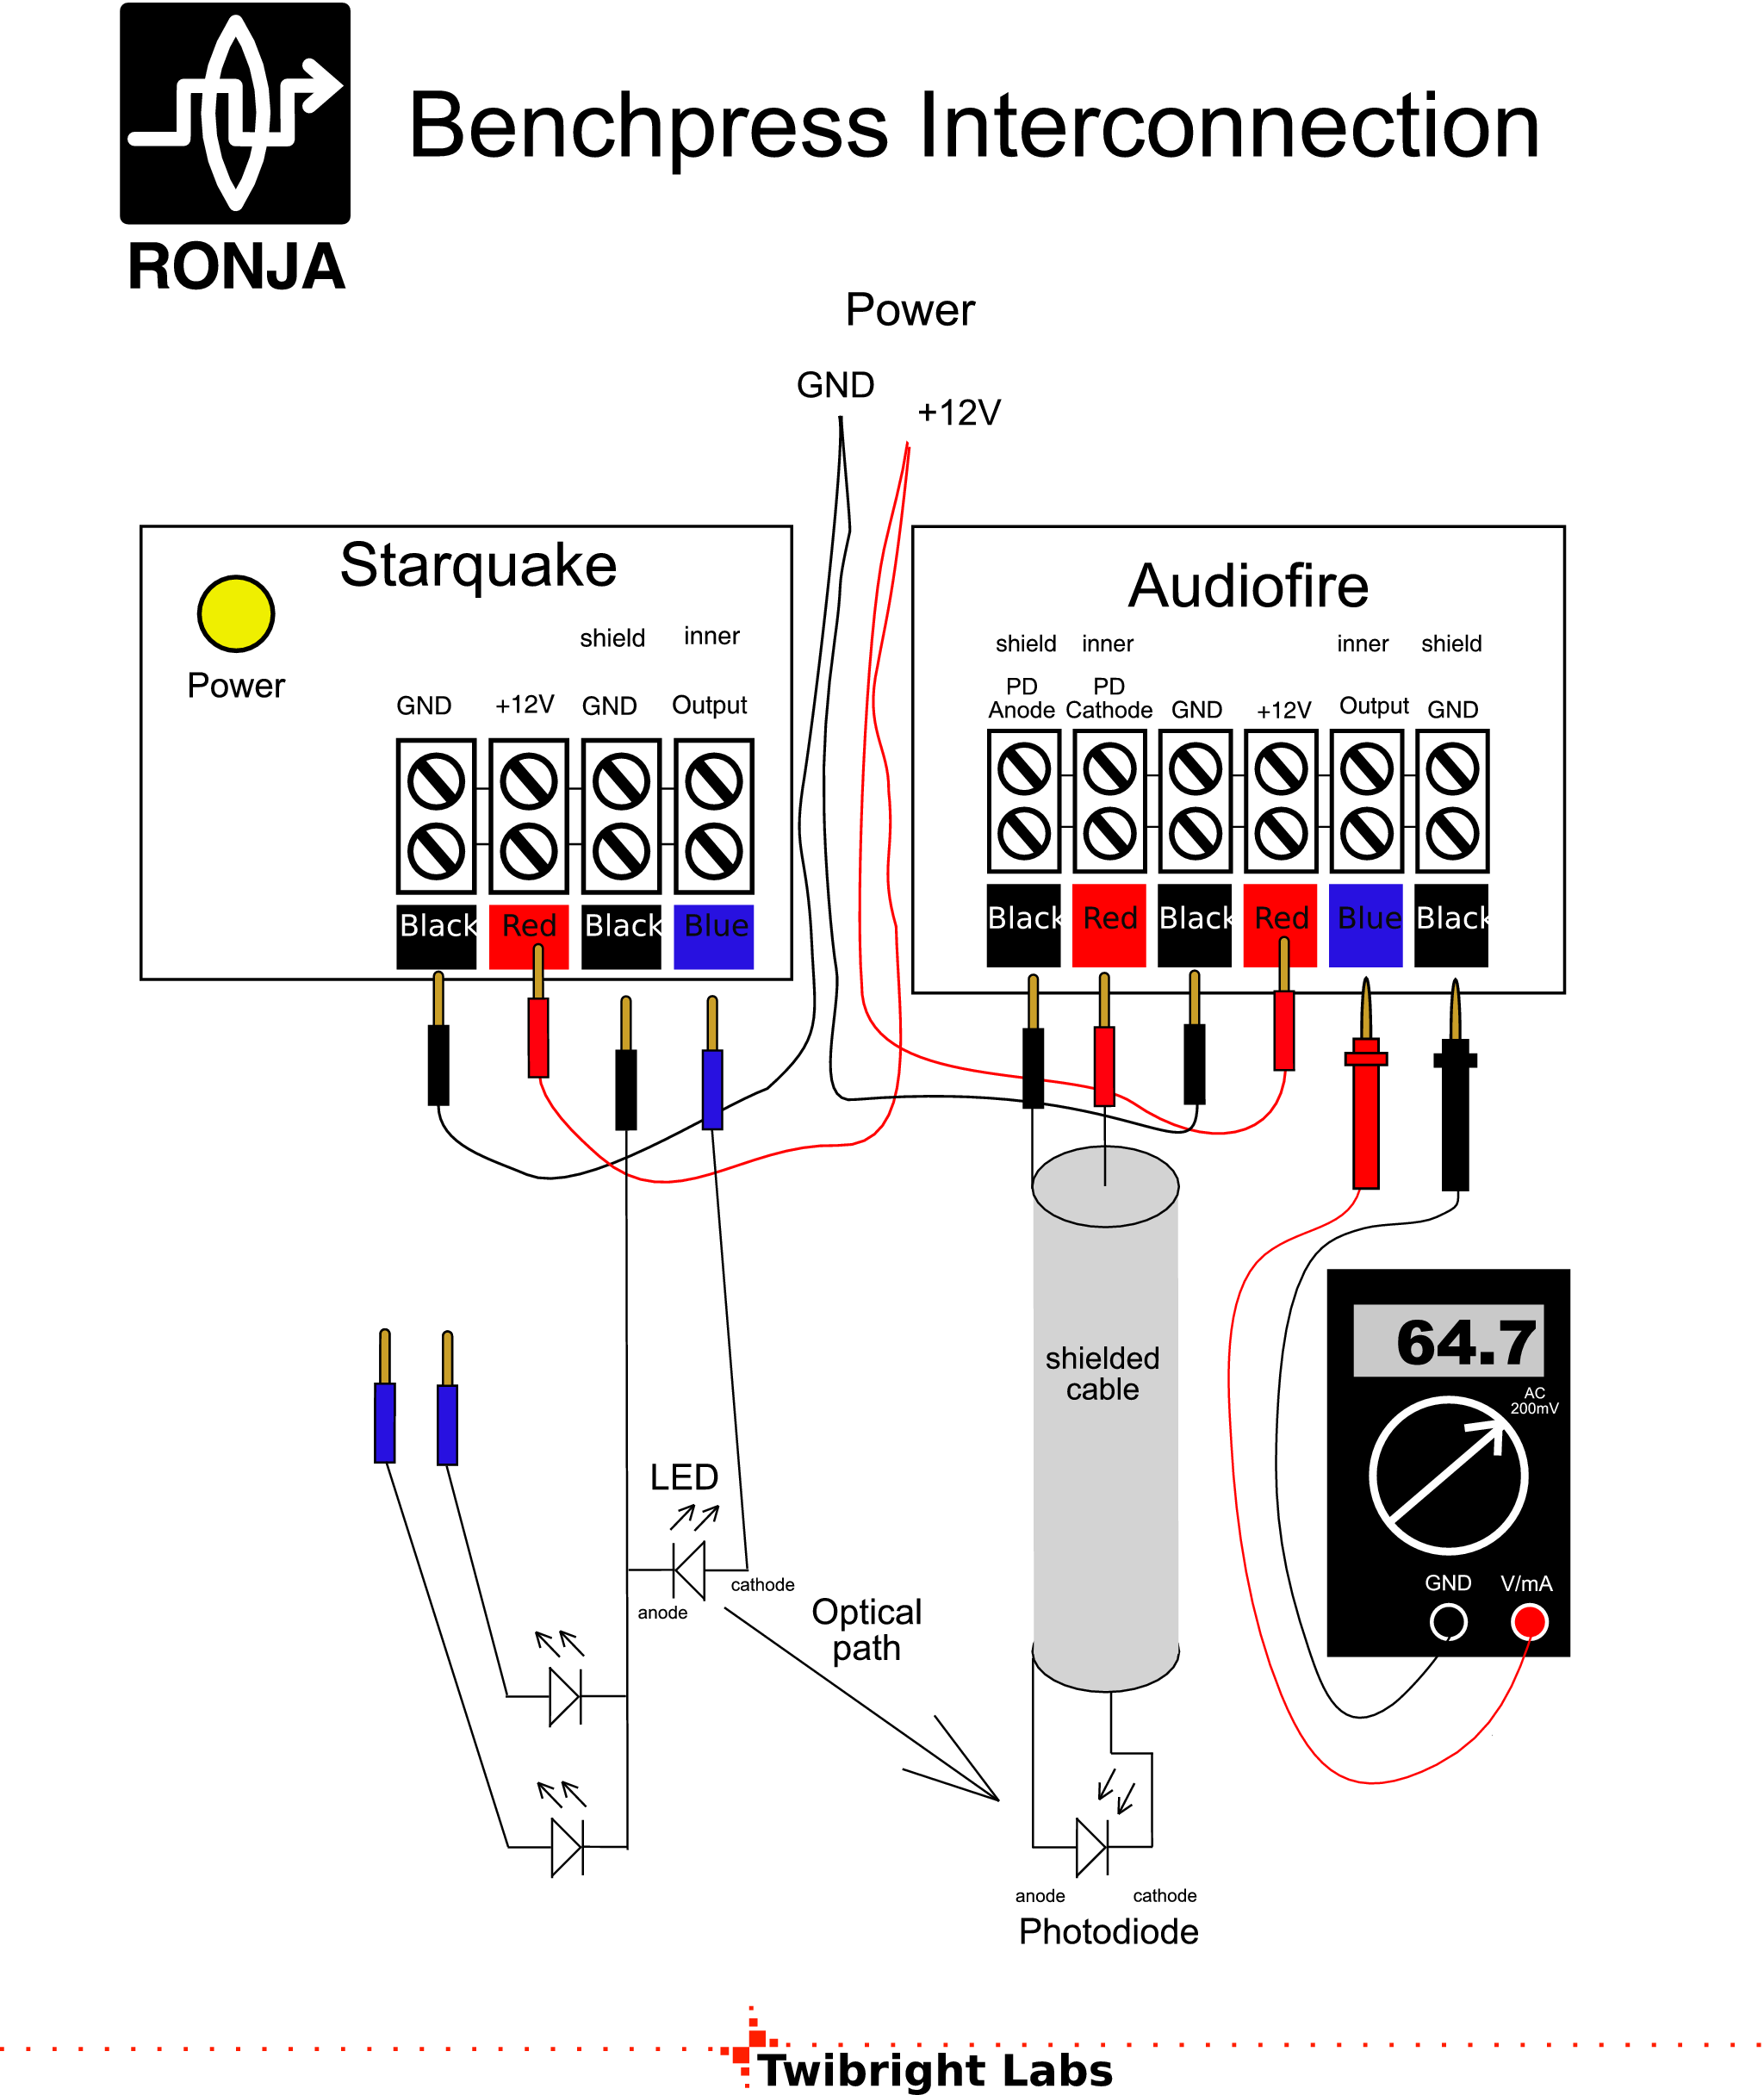
cableTake the photodiode and solder on shielded cable of 2m length.
Consult manufacturer datasheet to determine where cathode and anode is. |
|
|
|
|
Power source wires
Take your favourite wires from 12V laboratory power source and solder the
remaining 4 wire stubs on their ends. You can use also banana plugs if they
fit into the wire nut (it works for me) and you tighten them only gently. |
|
|

 Contact, support: Clock
on the Internet Relay Chat.© 1998-2016 Karel ‘Clock’ Kulhavý et al..
Contact, support: Clock
on the Internet Relay Chat.© 1998-2016 Karel ‘Clock’ Kulhavý et al.. ![Gallery[16b0]](http://images.twibright.com/tns/lvl1/16b0.jpg)
![Gallery[16ae]](http://images.twibright.com/tns/lvl1/16ae.jpg)
![Gallery[1672]](http://images.twibright.com/tns/lvl1/1672.jpg)
![Gallery[1683]](http://images.twibright.com/tns/lvl1/1683.jpg)
![Gallery[1684]](http://images.twibright.com/tns/lvl1/1684.jpg)
![Gallery[1685]](http://images.twibright.com/tns/lvl1/1685.jpg)
